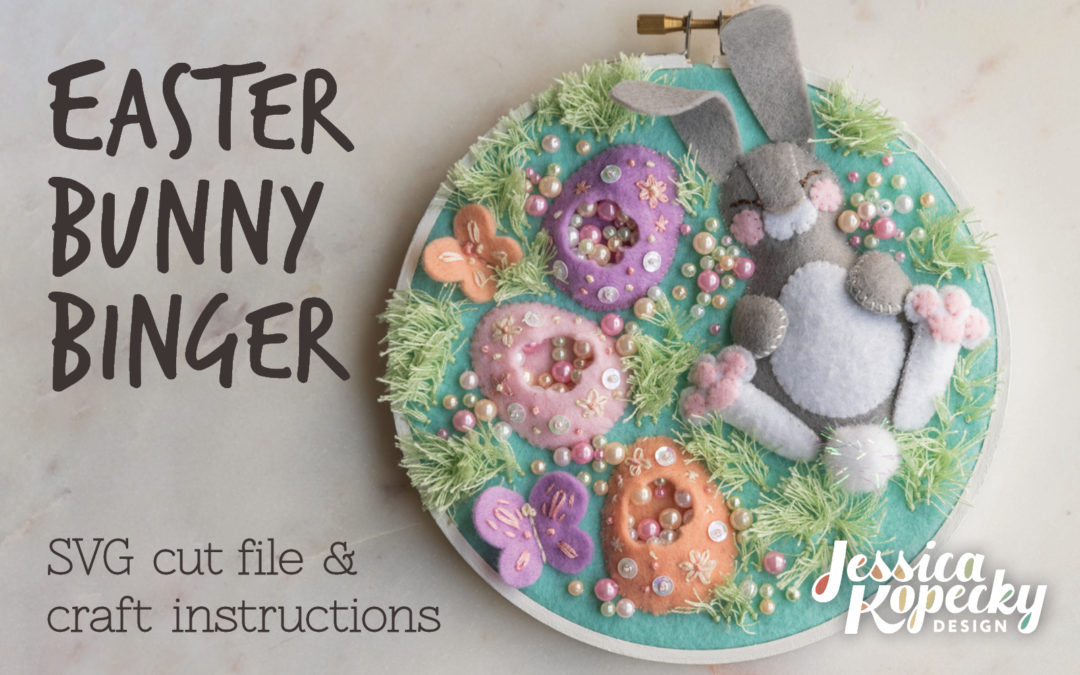
This Easter I made an eggstra special treat – embroidery hoop decor! Read on to see how I, and you, could make this felt ode to the jelly bean hangover.
I also had fun expanding my needle craft skill set by trying a new stitch for the grass. It was sew easy! *badum tsss
– – – – –
The pattern for this project is available for download on my Etsy shop. Please note that you can certainly use this post as inspiration to cut out and create your own shapes, but if you have a Cricut® Maker, rotary blade & fabric grip mat this craft is much easier.
I recommend that you read and look through these instructions before proceeding with assembly. Cricut Design Space instructions follow the craft tutorial.
Assembly

★ Embroidery floss – Note: for this project I separated my floss into two strands
★ Large beads (for jelly beans)
★ Pom pom
★ Small beads (for sequins)
★ Thread, size 10 beading needle, size 7 embroidery needle
★ Poly fil (stuffing)
After securing the hoop, I moved on to the bunny. First I sewed the pink bunny toes and foot pads to the feet, because I’m paranoid about losing small pieces. Then I sewed the mouth and face pieces onto the head and the white patch to his tummy.
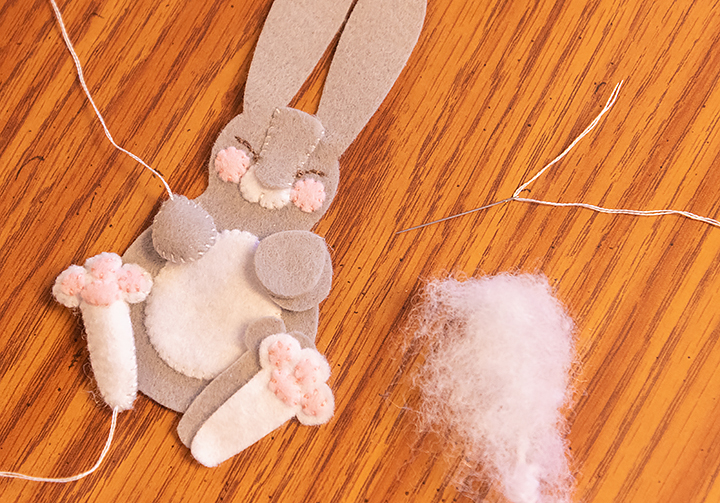
After the small felt details were sewn on, I sewed the front and back of the foot pieces together.
I started stitching them together at the base of the foot, then added a small amount of stuffing to give them a little poof before stitching all the way around. I did not tie off or trim the embroidery floss at the end. You’ll see why later.
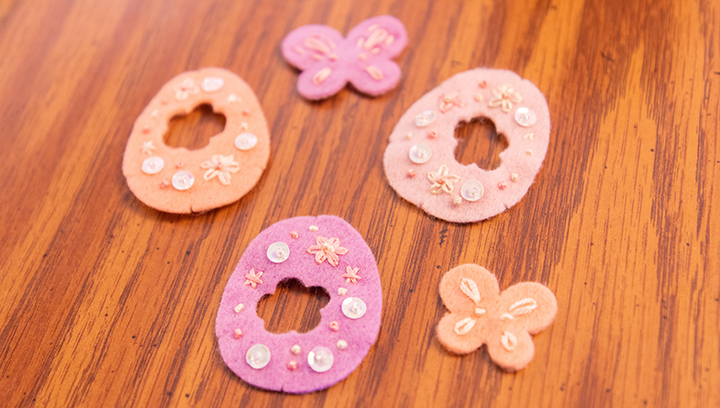
When the feet were done I switched gears and decorated the butterflies and tops of the eggs. Stitches shown are lazy daisy, french knot and chain.
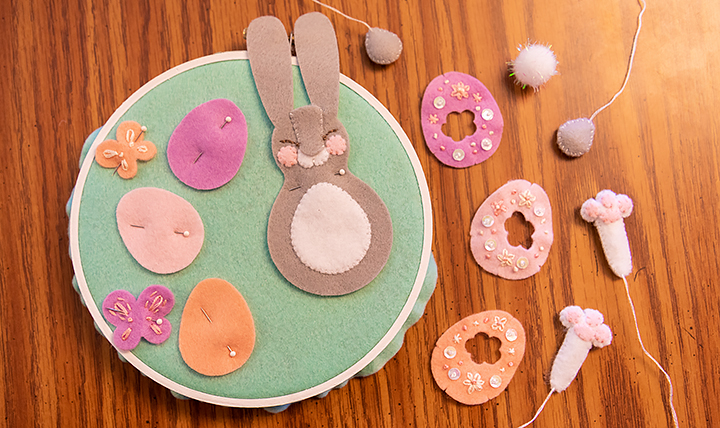
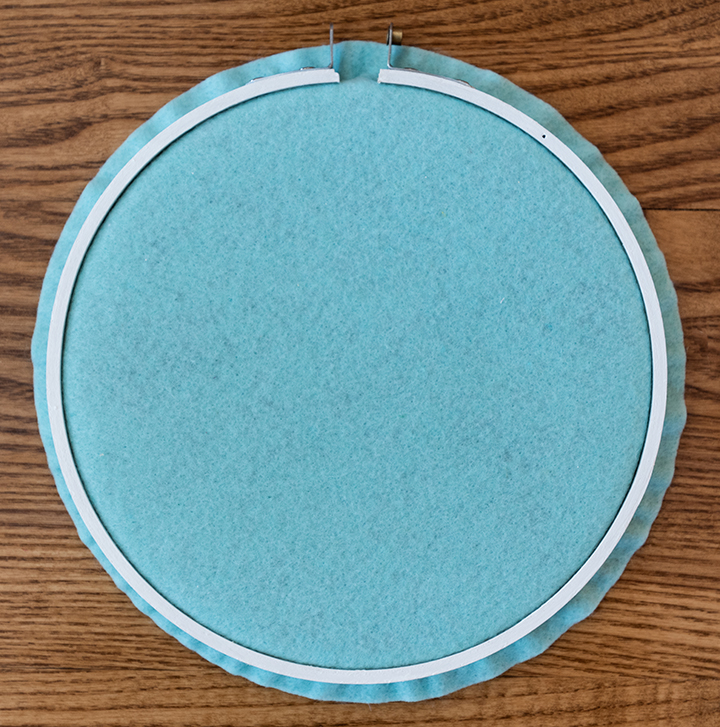
Here you can see all my pieces laid out and ready to go. I pinned the bunny, egg bases and butterflies to the hoop to plan my layout. Notice the embroidery floss sticking out of the bases of each foot as I mentioned before.
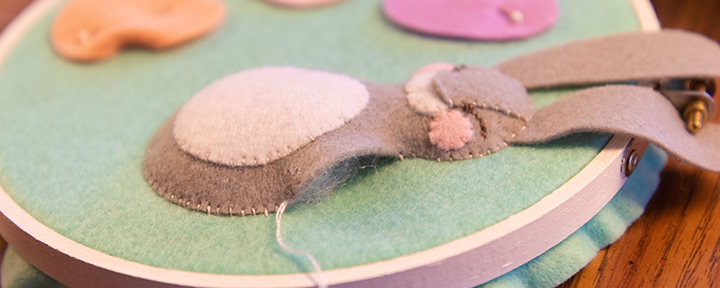
I sewed my bunny onto the hoop and stuffed it before closing it up. I found it was best to start at the base of the neck and work my way around. Due to the stuffing there was a little shape warping in the shoulder area where I closed it up, but I was able to cover it up with one of his feet.
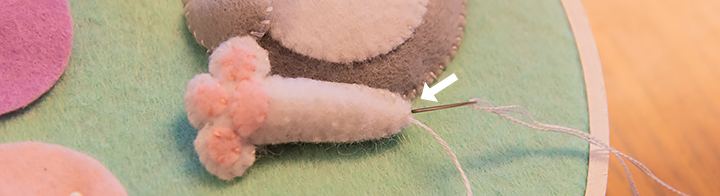
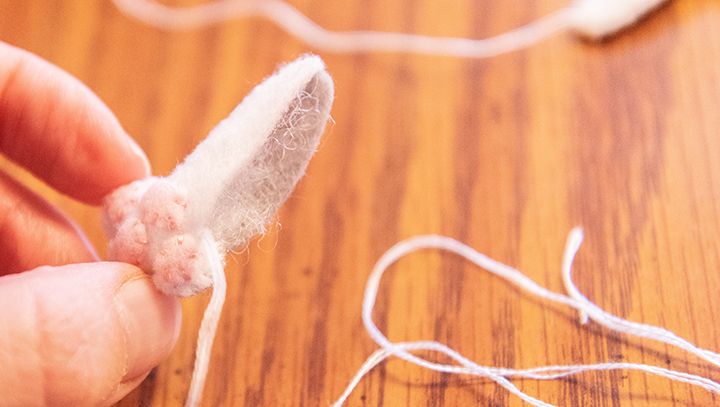
Then it was time to add each foot. This where the extra floss comes in handy. I started by using it to stitch the heel to the hoop…
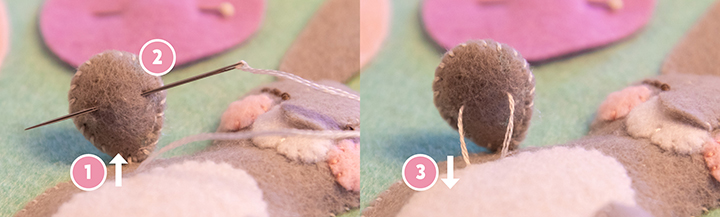
Then I tacked the rest of the foot on like so:
- Up through the back of the hoop and the bunny
- Needle through the bottom felt only
- Stitched back down through the bunny and hoop
Next I added the eggs. The egg bases were already pinned to the hoop back when I laid out the design (man I crack myself up with these puns).
In the past I’ve gotten myself into this predicament where I put my sewing pins into tight spaces and can’t get them out. I could tell it was about to happen again so I did this…
- Pinned object
- Flip to the back of the hoop
- Add another pin through the back
- Flip to the front of the hoop
- Remove the pin from the front
- Pinned from the back! Won’t get stuck!
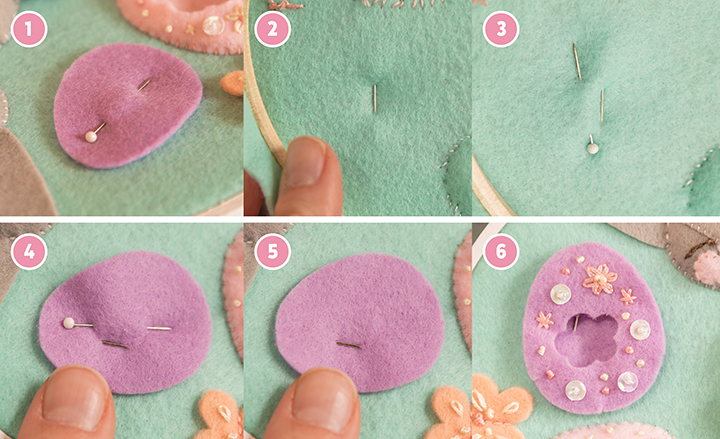
Next I made sure the top piece of the egg was centered over the base with equal amounts of felt sticking out around all sides. The top pieces were slightly larger than the base pieces to create a slight dome/3D effect once sewn on. Speaking of which…
The top pieces also have tiny darts at the top, bottom, left and right. This prevents puckering around the edges as it’s sewn on.
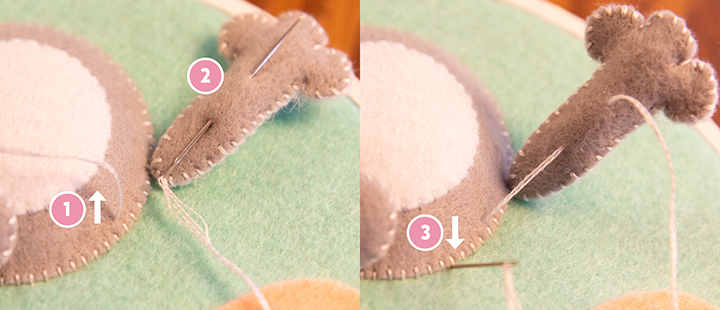
To achieve the domed effect I stitched like this:
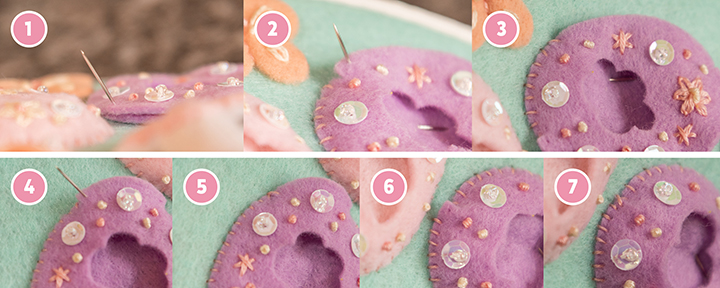
- Up through the back of the hoop at an angle to pass through both the base and top pieces at the same time
- Stitched around the edge until the first dart.
- Stitched the dart at an angle slightly over top of the previous stitch, repeated along all portions
- Last section…
- Pinned back/over as in 3…
- Sewed along the edge until the last stitch
- Crossed the felt slightly over the first stitch with the last stitch
It might look complicated but it actually felt pretty natural. 😀
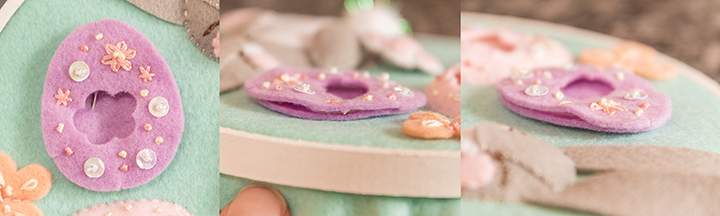
The next step took the longest – adding detail. I sewed decorative beads into and around the eggs to look like jelly beans. I also added them next to the bunny’s face to add an extra bingy effect. Then I added grass in patches using the turkey stitch – it was fun and easy to learn! Click here to watch the tutorial that taught me.
At some point in the process I sewed on the pom pom tail and butterflies. I forgot to take a photo of that. Boo. It didn’t really matter when they went on but I added them before I put on the eggs.
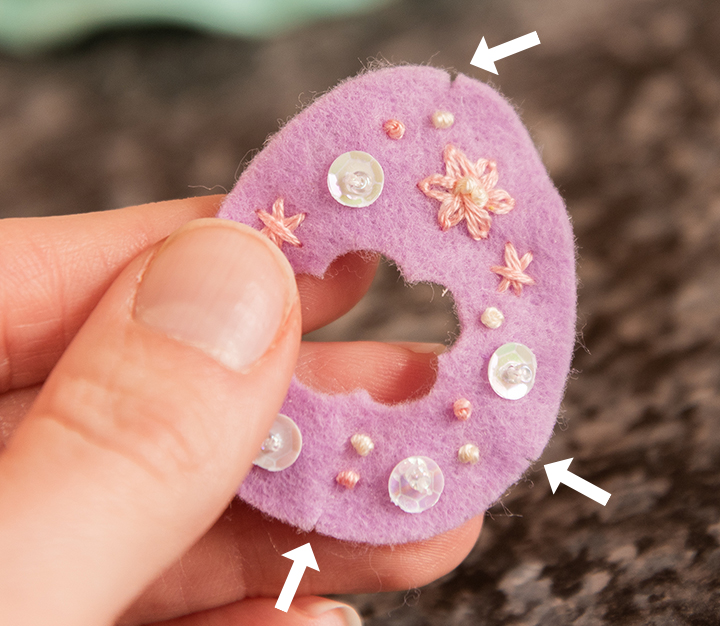
When I was done adding all the jelly beans and grass I trimmed the excess felt from the back outer edge of the circle with scissors.

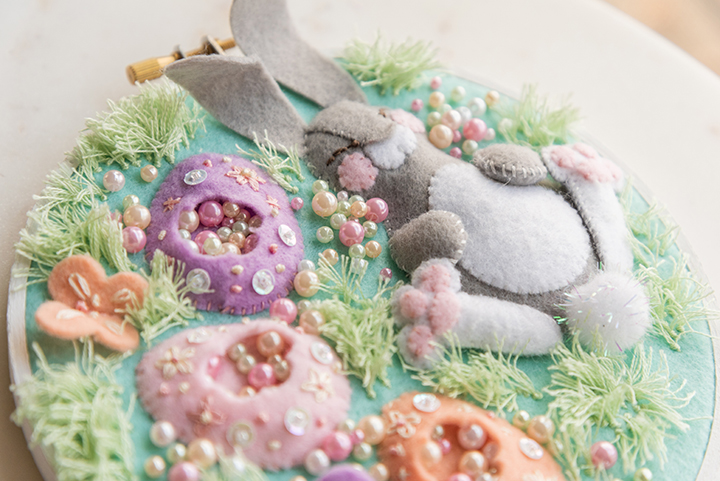
Voila! Finished piece.
Cricut Design Space Instructions
- Open Cricut Design Space.
- Click on New Project.
- Click the Upload button, then click Upload Image.
- Drag and drop to upload easterbunnybinge.svg. OR click Browse and navigate to the file, then click Open. Click Save.
- Click the image, then click Insert Images.
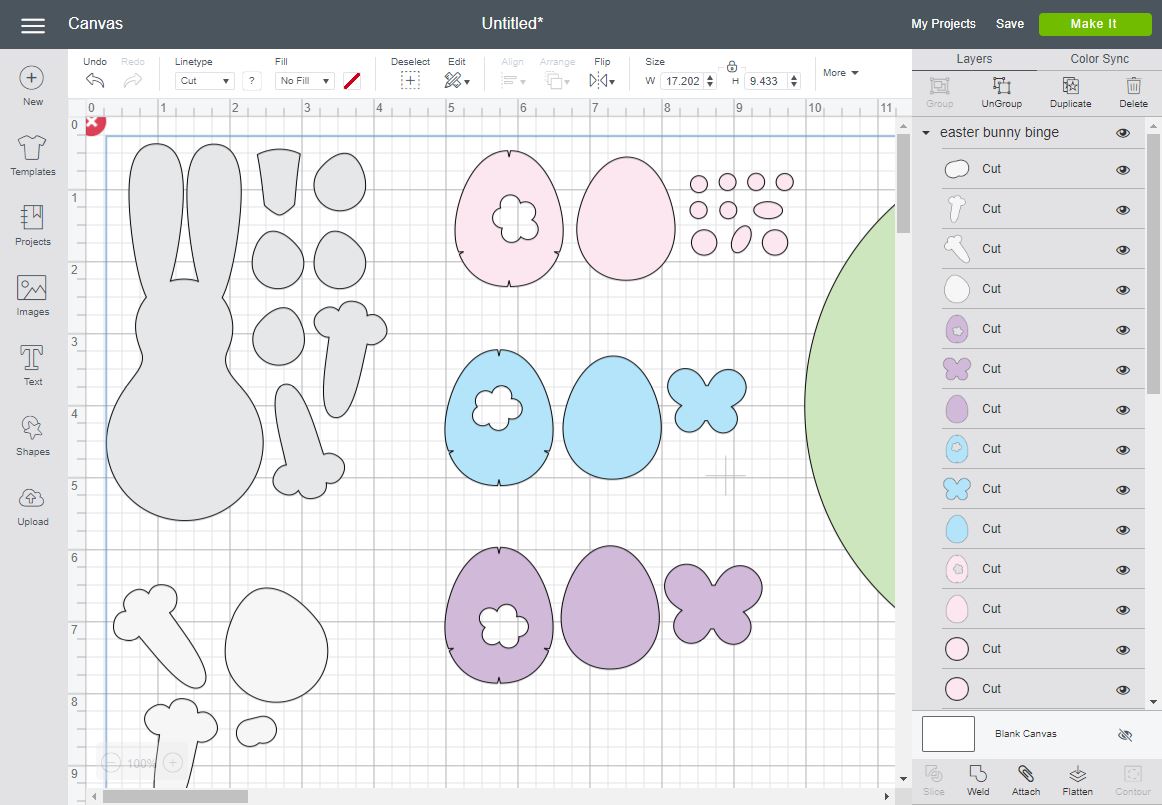
- The image will appear on the Canvas.
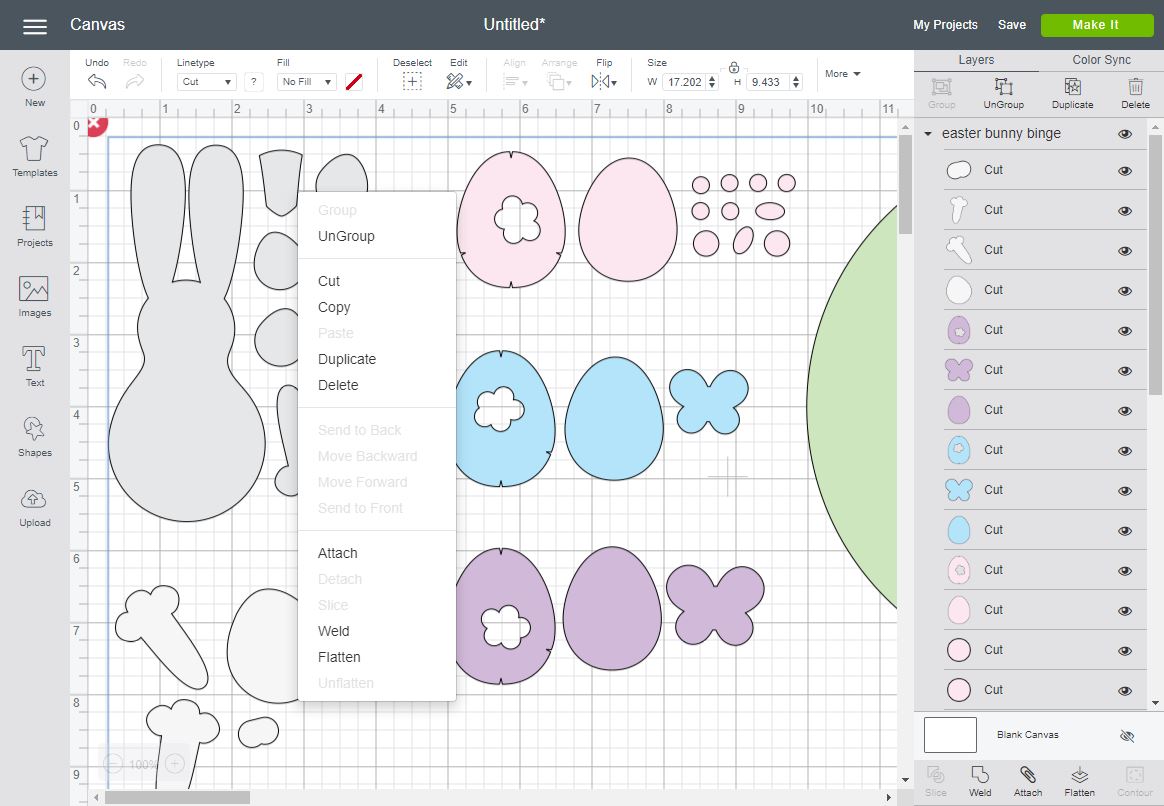
- Right-click on the pattern. I drop down menu will appear. Click Ungroup.
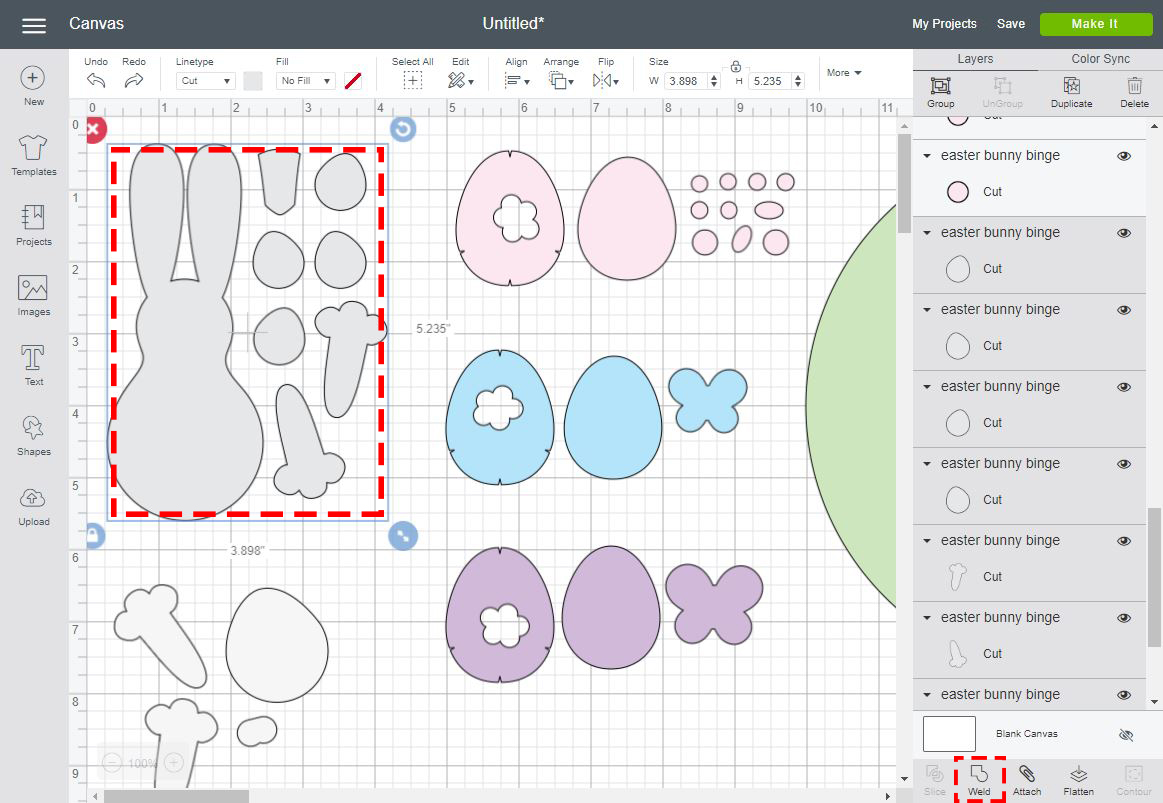
- Click and drag with your mouse to select the gray bunny shapes, then click Weld at the bottom of the Layers panel on the right. Repeat this step for each color. The process of welding will save materials.
- Click Make It.

- The layers will automatically separate onto different mats based on color. Click Continue.
- Follow the on-screen instructions to select your material – FELT.
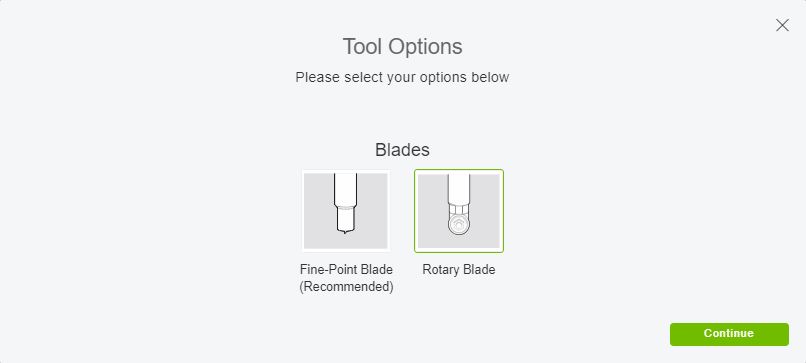
- Click on Edit Tools on the far right side of the screen, then select the ROTARY BLADE and click Continue.
- Insert the fabric grip mat with felt into your machine to cut out your Easter Bunny Binge embroidery hoop!

This is my favorite of all of your designs so far. Love the idea of a bunny over-indulging on jelly beans for Easter. 🙂