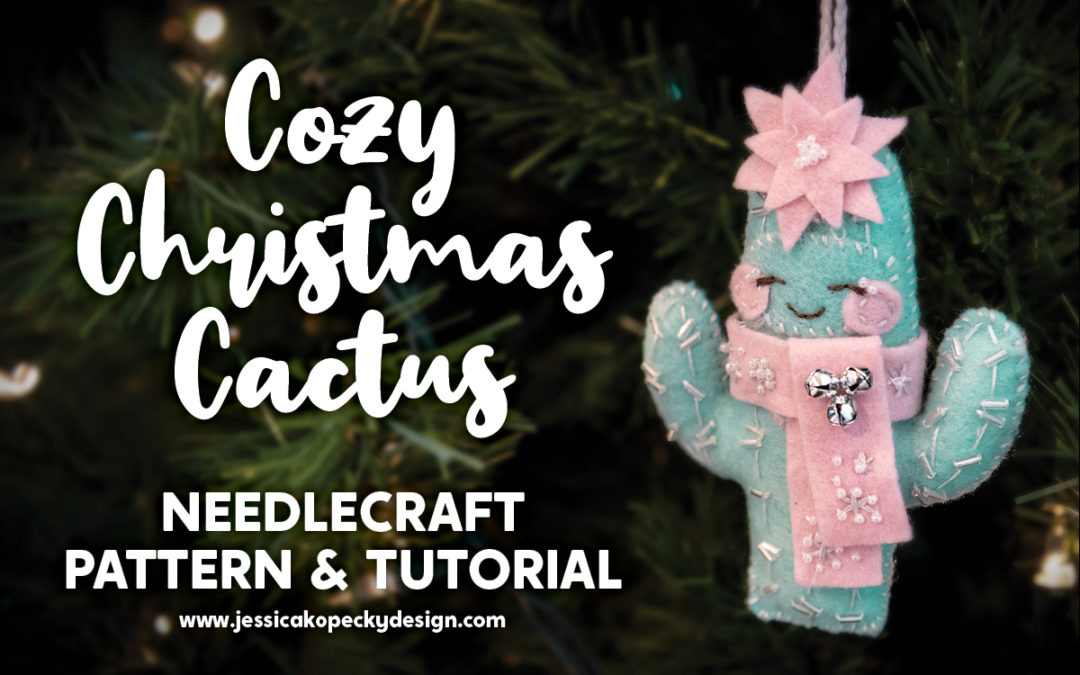
This cute and cozy cactus is all ready for a white Christmas! Try this fun little ornament for your next needlecraft project.
There are a lot ways you could make this project your own through the use of different felt colors, beads, stitch-work, decorations, etc. The tutorial below shows the step-by-step process and the design decisions I made while putting mine together.
If you have a Cricut® Maker, a cut file is available for download on my Etsy page. It includes an SVG cut file and Cricut Design Space computer instructions that can be found after the ornament assembly instructions.
Ornament Assembly
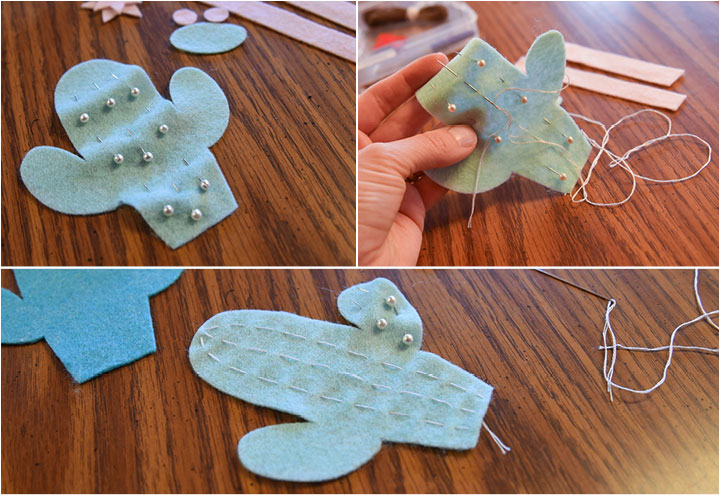
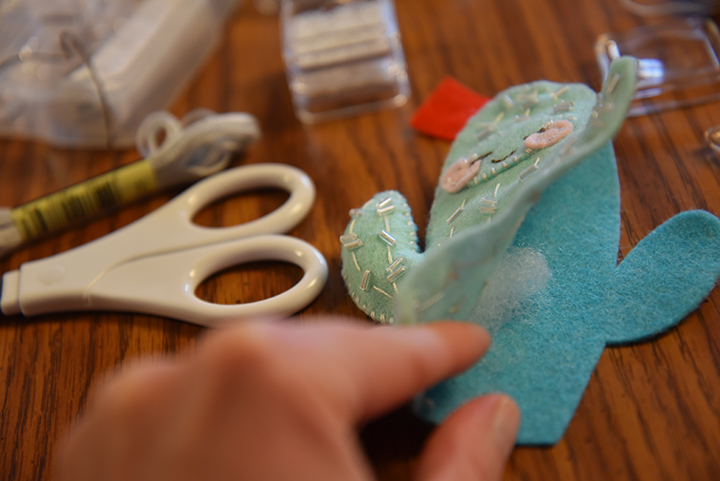
To start, I sewed details on the front of the body. I used sewing pins to plot out lines that I added as detail (optional). I used 2 strands of embroidery floss for this detail and a running stitch to create a dotted line on the “body” and “arms”.
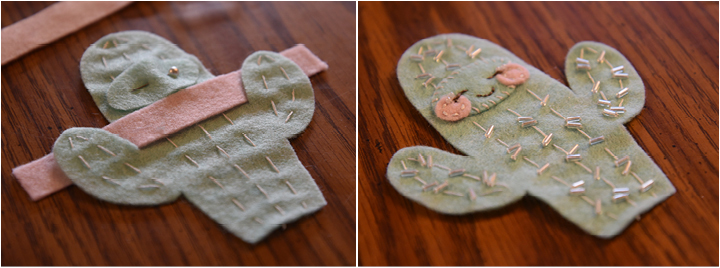
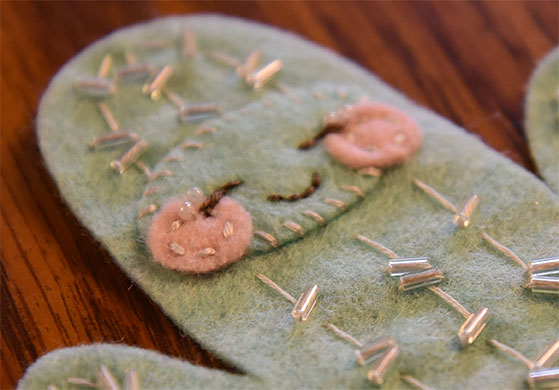
Using the neck portion of the scarf as reference (see materials image above), I pinned the oval face shape in place, then removed the scarf. I sewed on the face, then the cheeks, then the eyes and mouth using embroidery floss. Then I added spines using clear tube beads.
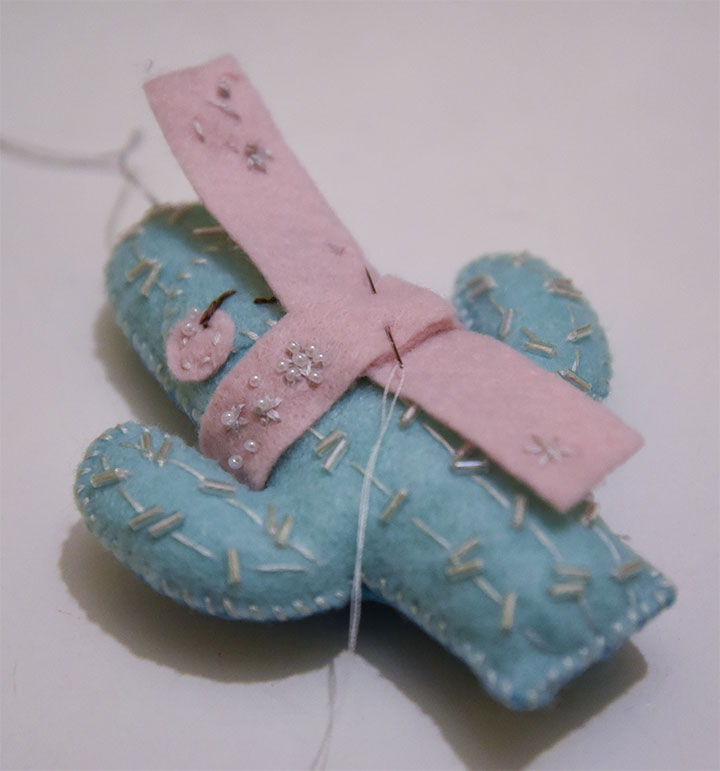
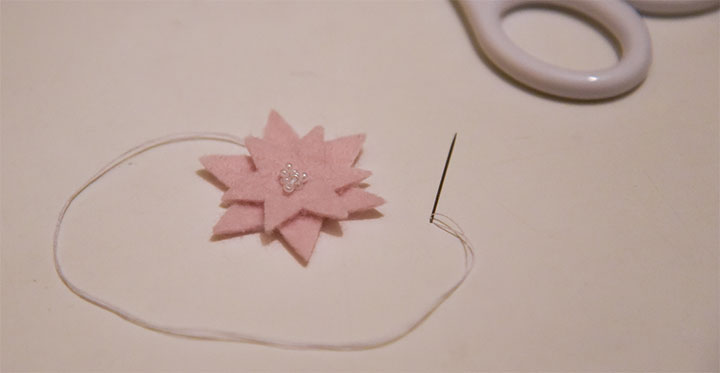
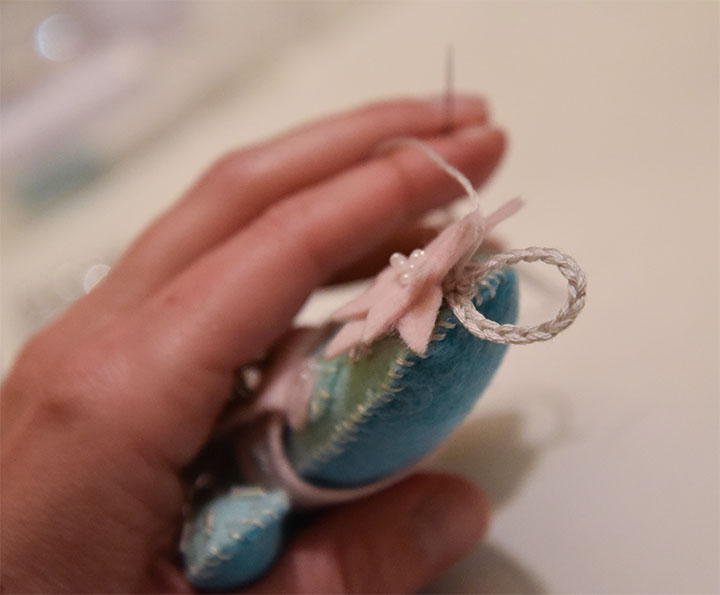
…then sewed the flower to the top of a head. Behind the flower, I was able to conceal my knot and a braided embroidery floss loop I sewed on for an ornament hook.

Voila! Finished piece.
Cricut Design Space Instructions
- Open Cricut Design Space.
- Click on New Project.
- Click the Upload button, then click Upload Image.
- Drag and drop to upload cozycactus.svg OR click Browse and navigate to the file, then click Open. Click Save.
- Click the image, then click Insert Images.
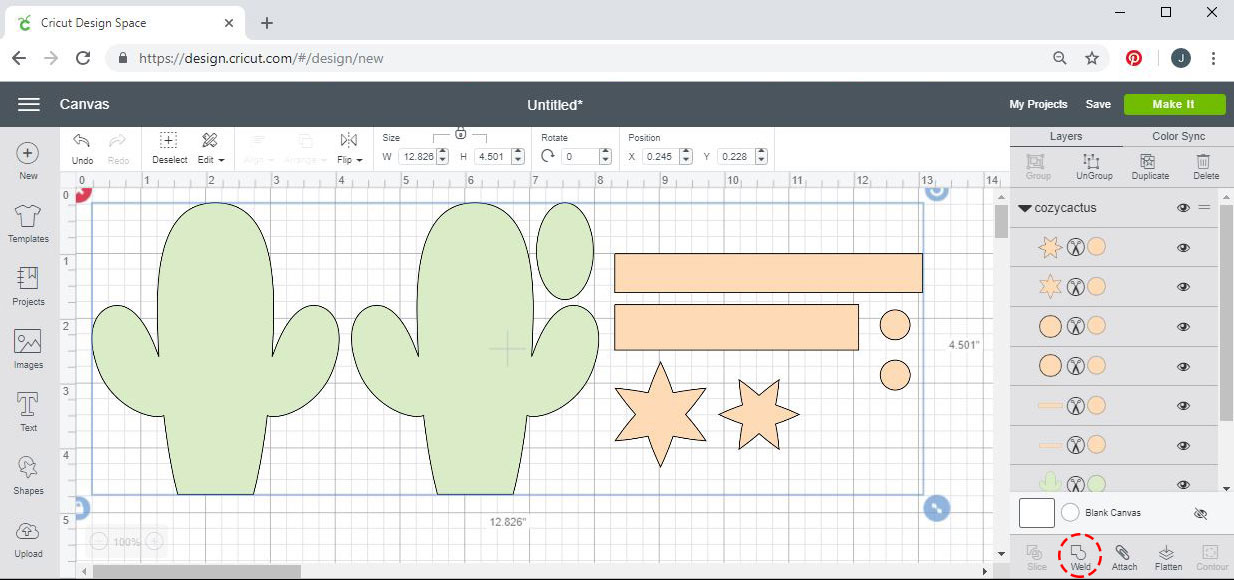
- The image will appear on the Canvas. Under Layers on the right side of the screen, select all the PINK layers, then click the Weld button on the bottom of the Layers panel. Do this for the GREEN layers as well. This step allows you to save more felt when it’s time for the machine to cut.
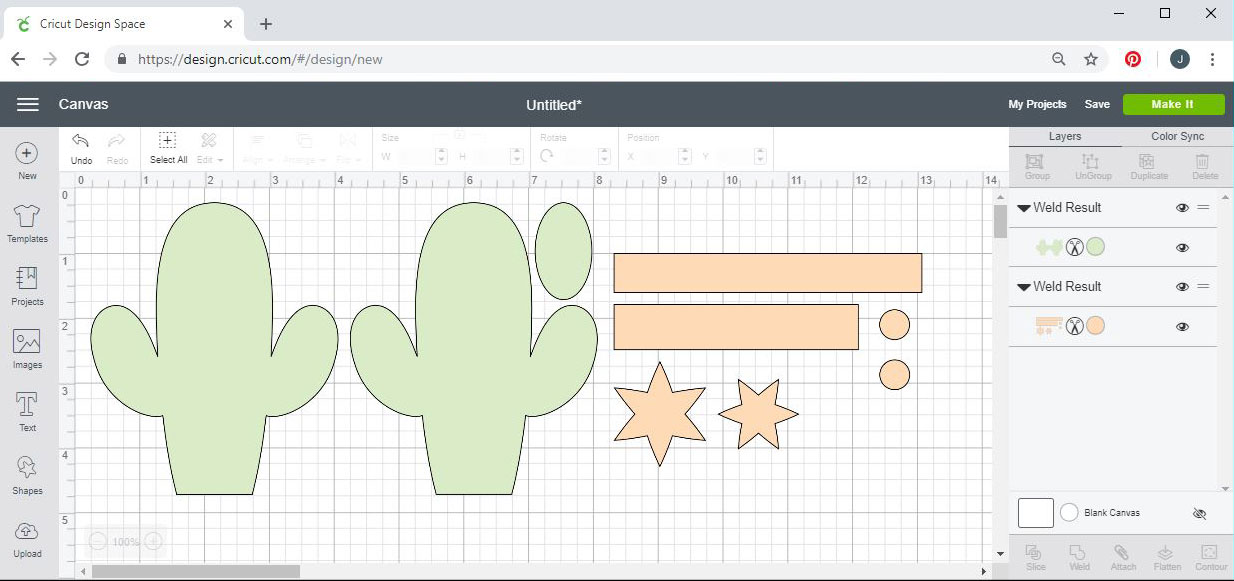
- You will see the Weld Result on the layers panel at the right side of the screen. In the upper right portion of the screen, click Make It.
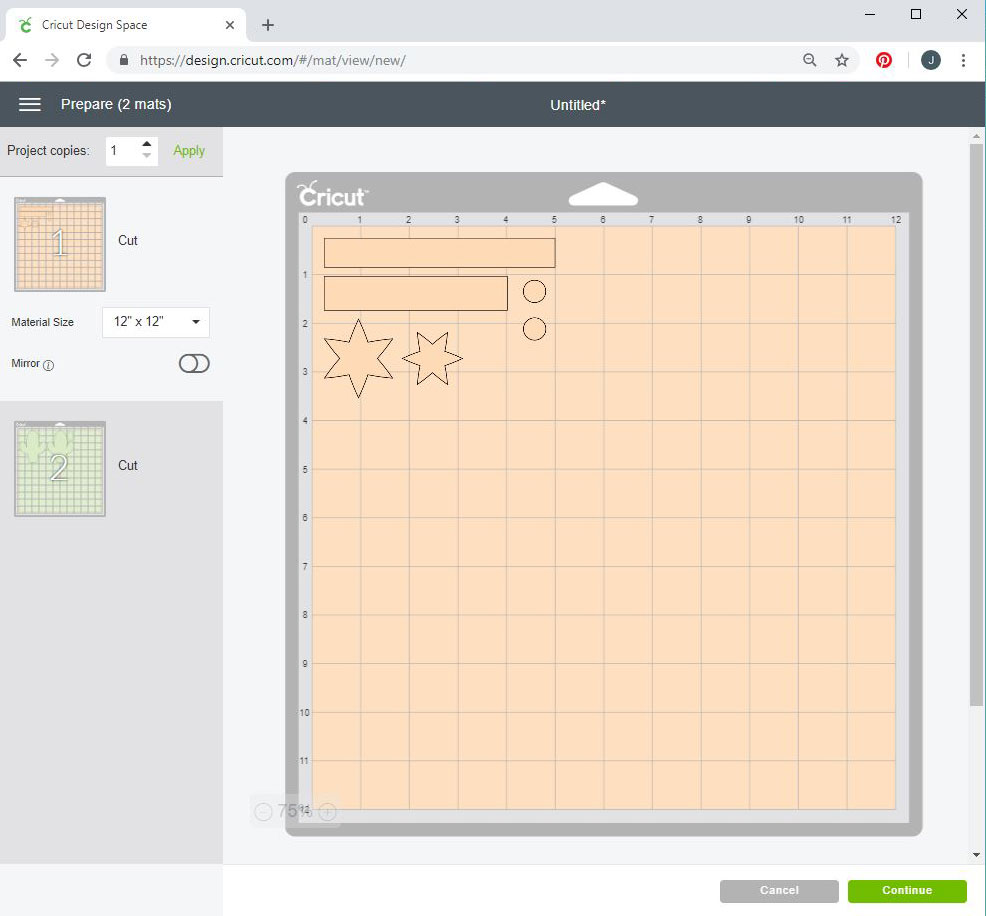
- The layers will automatically separate onto two mats based on color. Click Continue.
- Follow the on-screen instructions to select your material – FELT.
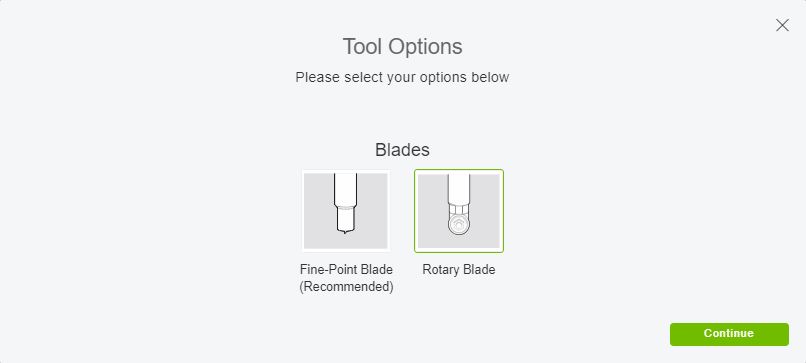
- Click on Edit Tools on the far right side of the screen, then select the ROTARY BLADE and click Continue.
- Insert the fabric grip mat with felt into your machine to cut out your Cozy Christmas Cactus Ornament pieces!

Recent Comments