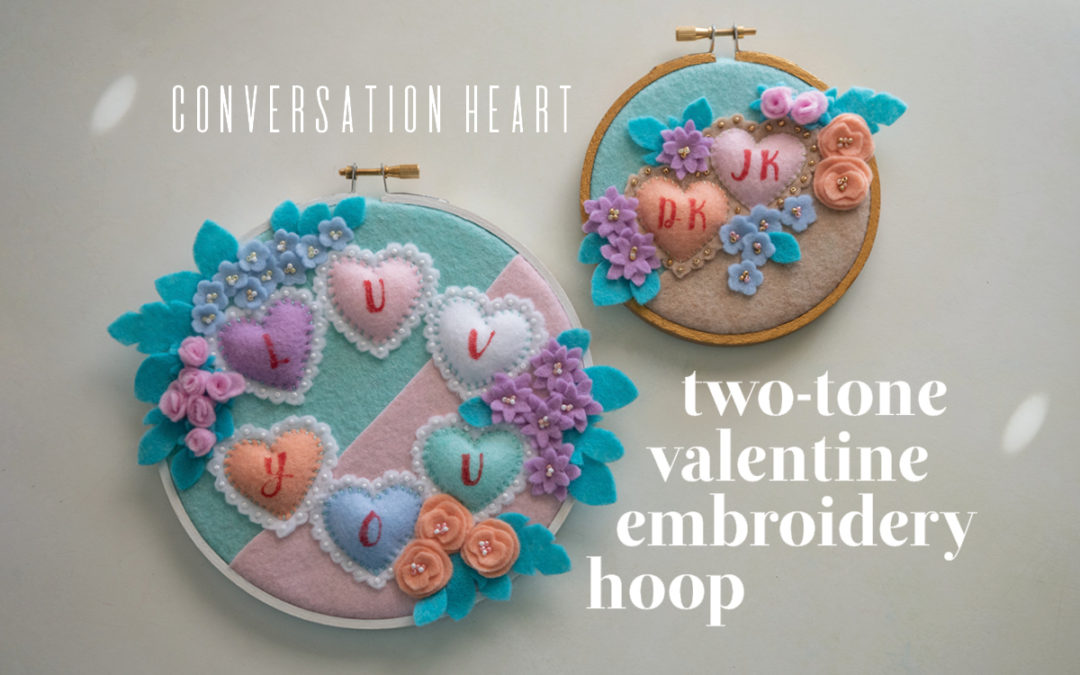
Valentines, bouquets, love and conversation hearts – this seasonal felt decor project combines embroidery hoop crafting with 3D felt creations and these additional craft concepts:
- Stamping on felt (…or not… a preview of the craft stamp-free is below)
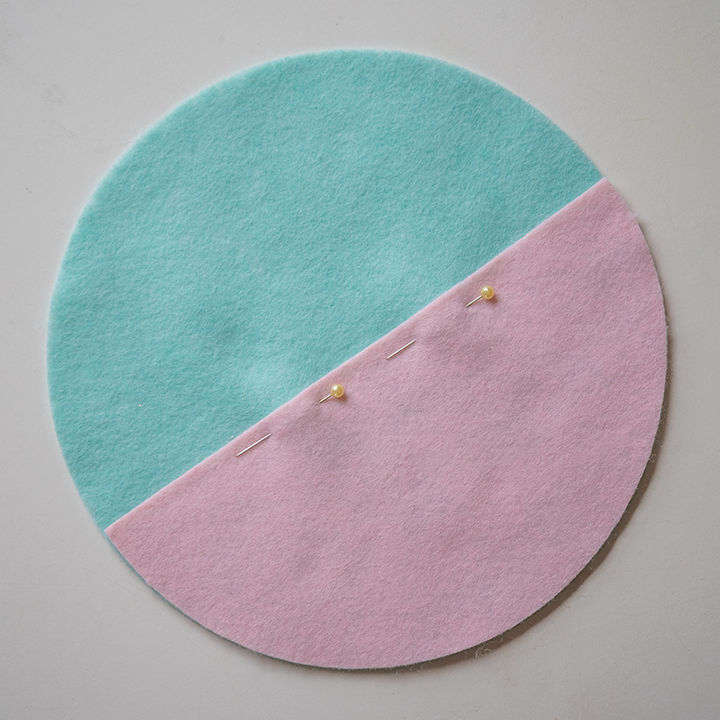
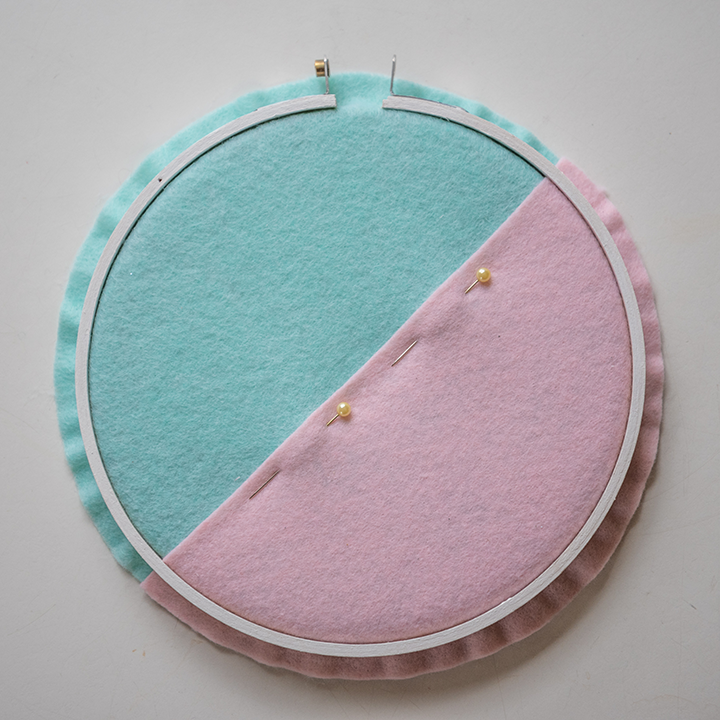
- Two-tone embroidery hoop color
Click here for the pattern on Etsy. I will show my assembly process in photos below, followed by Cricut Design Space computer instructions. I recommend that you read and look through these instructions before proceeding with assembly – the pictures are worth a thousand words…
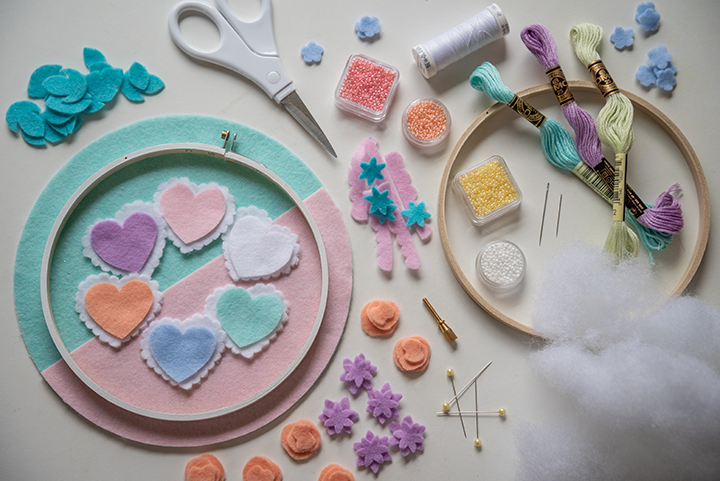
★ Thread, size 10 beading needle, size 7 embroidery needle
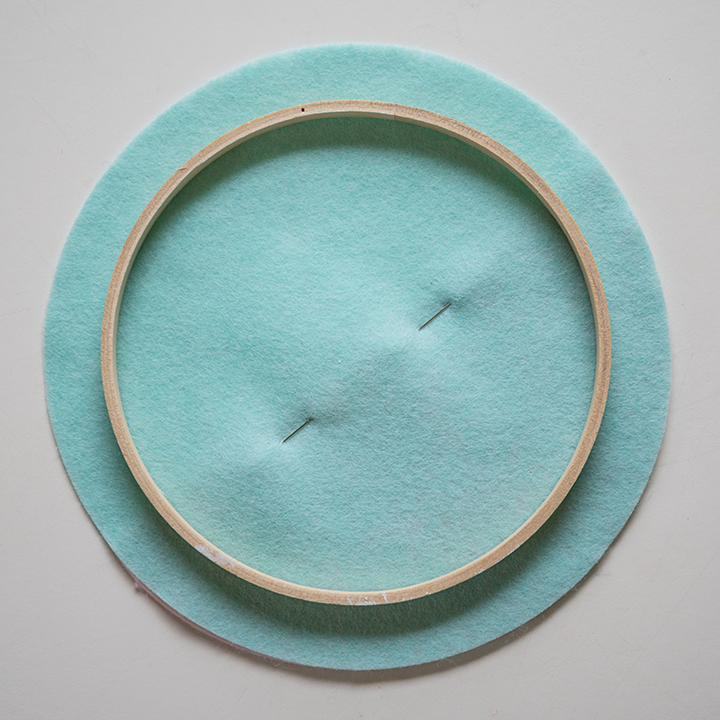
Assembly
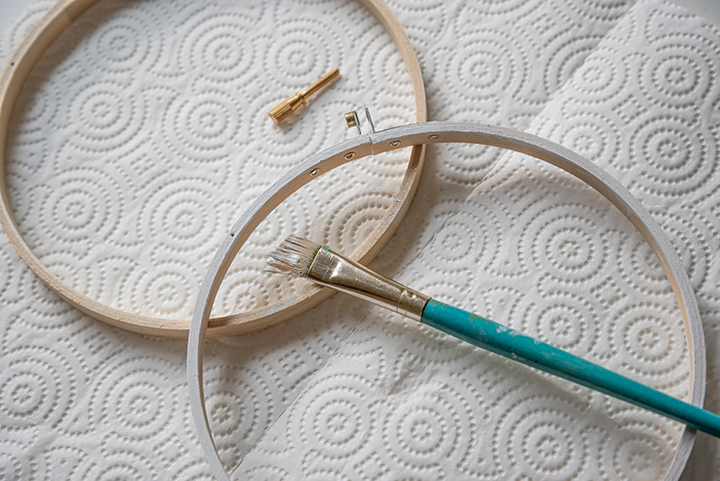
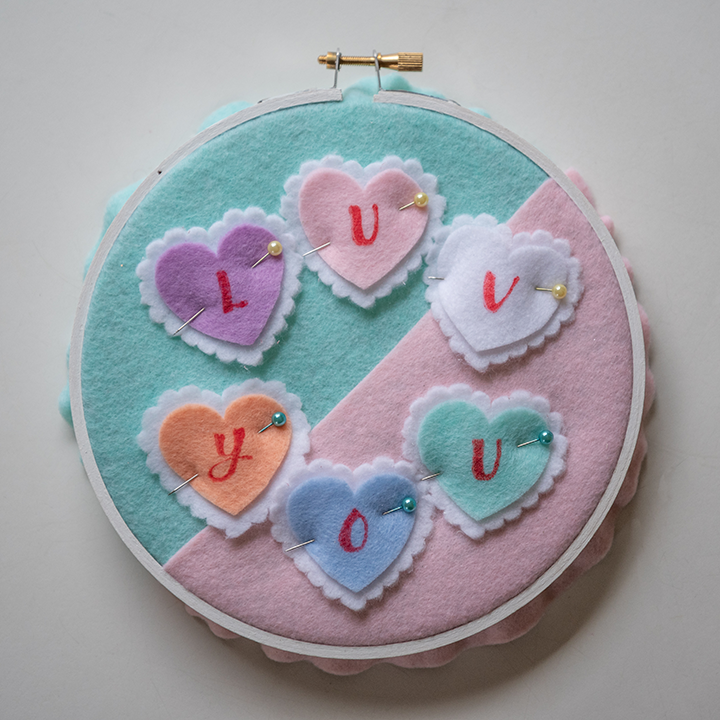
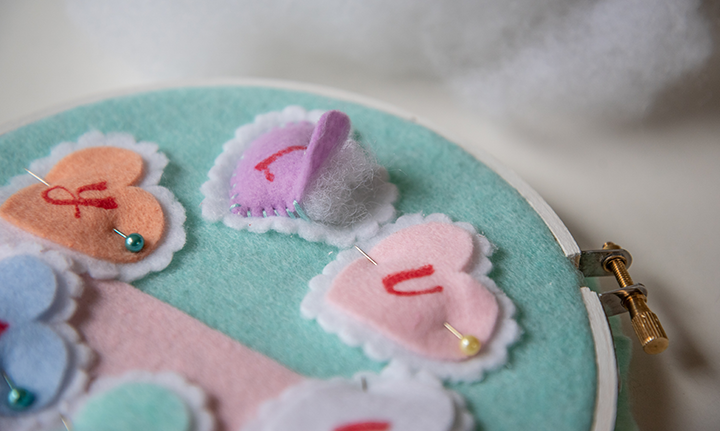
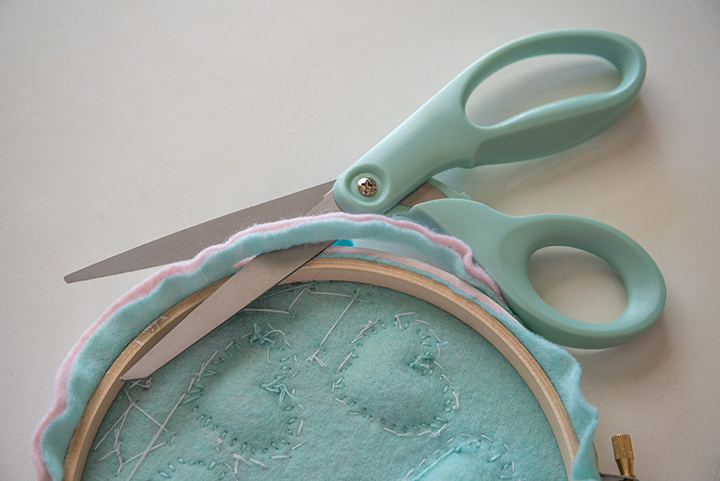
First things first, I painted the outer embroidery hoop. I chose white for my 6″ design (shown).
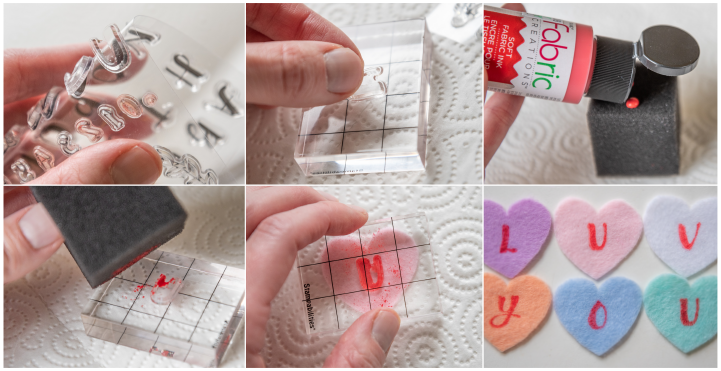
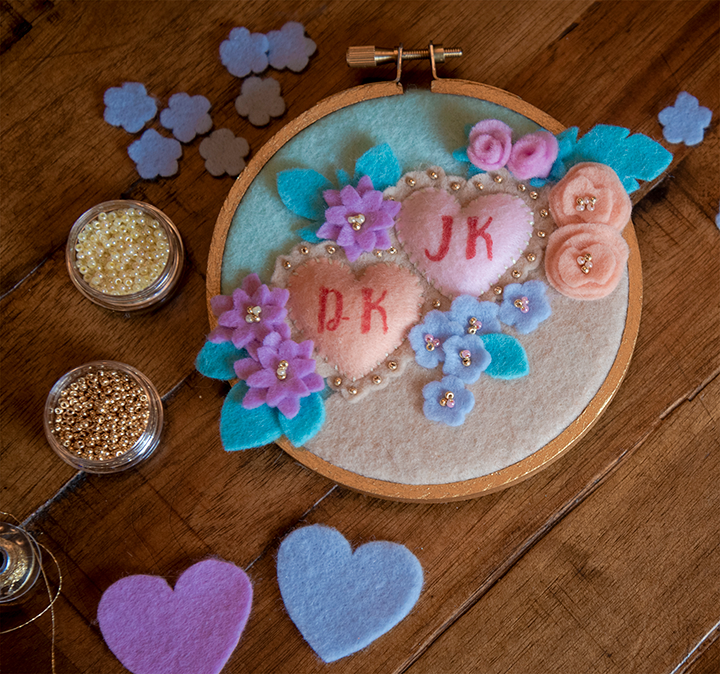
While the hoop dried, I used Plaid’s Fabric Creations Soft Fabric Ink, a sponge cube, and 1/2″ tall clear alphabet stamps to add lettering to my conversation hearts. On the 6″ hoop, I spelled “LUV YOU.” On the 4″ hoop, I stamped my son’s and daughter’s initials.
You can arrange the heart cut outs however you like and stamp whatever you wish. The clear stamps and clear stamping block I found allowed me to see exactly where I was placing my letters, and I was really pleased with how well the soft fabric ink worked on my felt. I was able to find my clear alphabet stamps at Hobby Lobby, but I have seen more and different fonts at other craft stores.
Of course, you could also completely skip the felt stamping. Hearts and flowers are cute enough on their own! I’ve still got that image coming… keep scrolling…
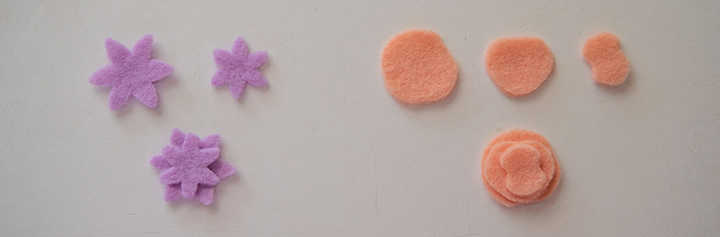
- Poppies (shown in orange, above)
- Forget-me-nots (shown in blue, two photos down)
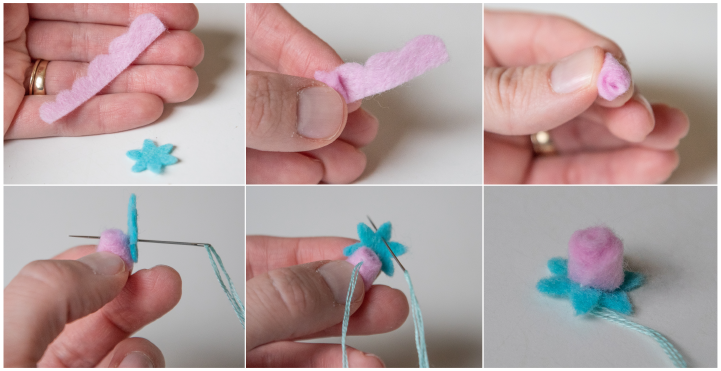
- Rose buds (assembly below)
- Some default flower shape that’s not based on anything but looks legit (shown in purple, above)
- Leaf assortment
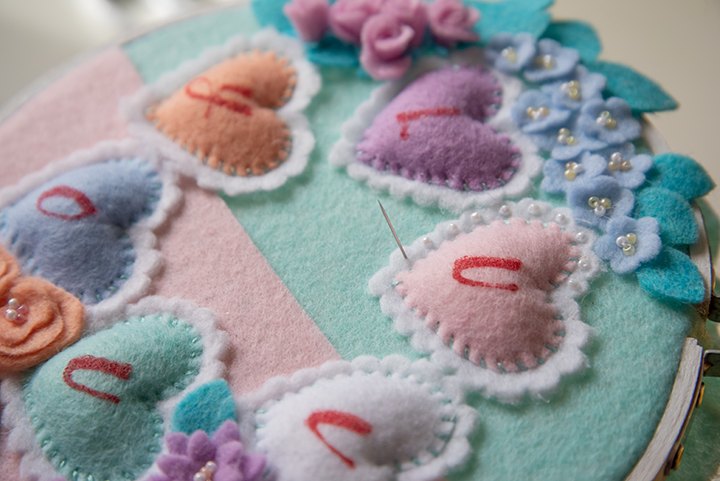
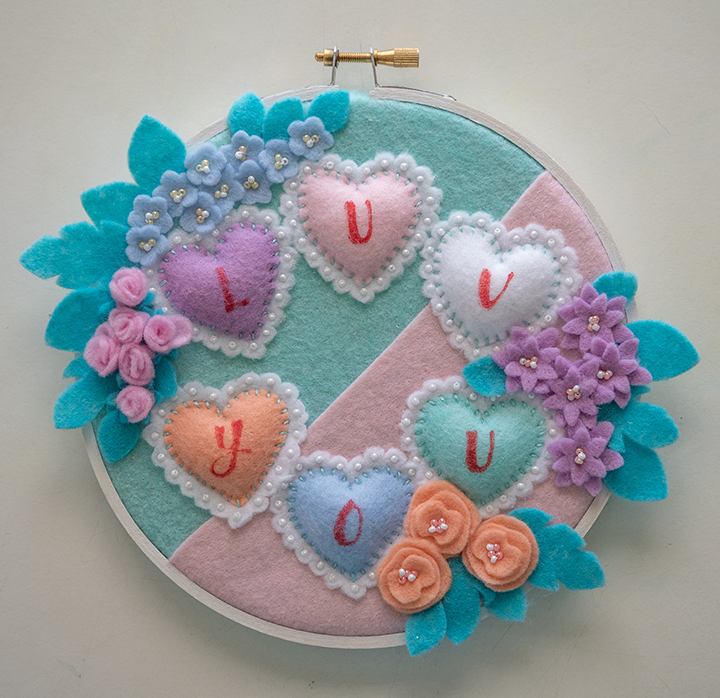
Voila! Finished products above and below. Keep scrolling if you want to see what it looks like with no stamps.
- Open Cricut Design Space.
- Click on New Project.
- Click the Upload button, then click Upload Image.
- Drag and drop to upload 4inch-conversation-heart-two-tone.svg, or 6inch-conversation-heart-two-tone.svg OR click Browse and navigate to the file, then click Open. Click Save.
- Click the image, then click Insert Images.
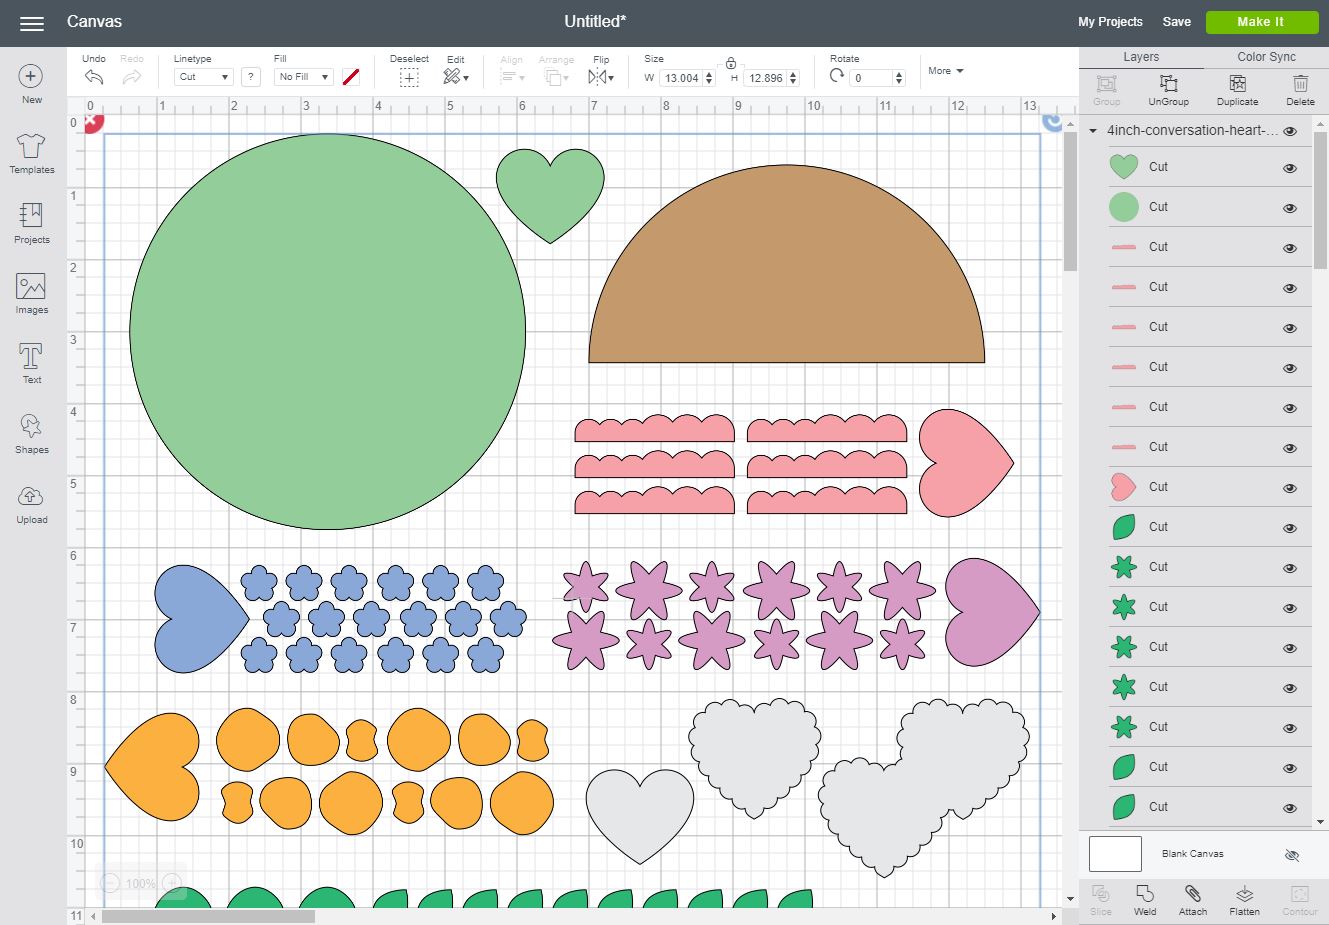
- The image will appear on the Canvas. These files have a lot of information and may take a moment to load (4″ hoop SVG shown).
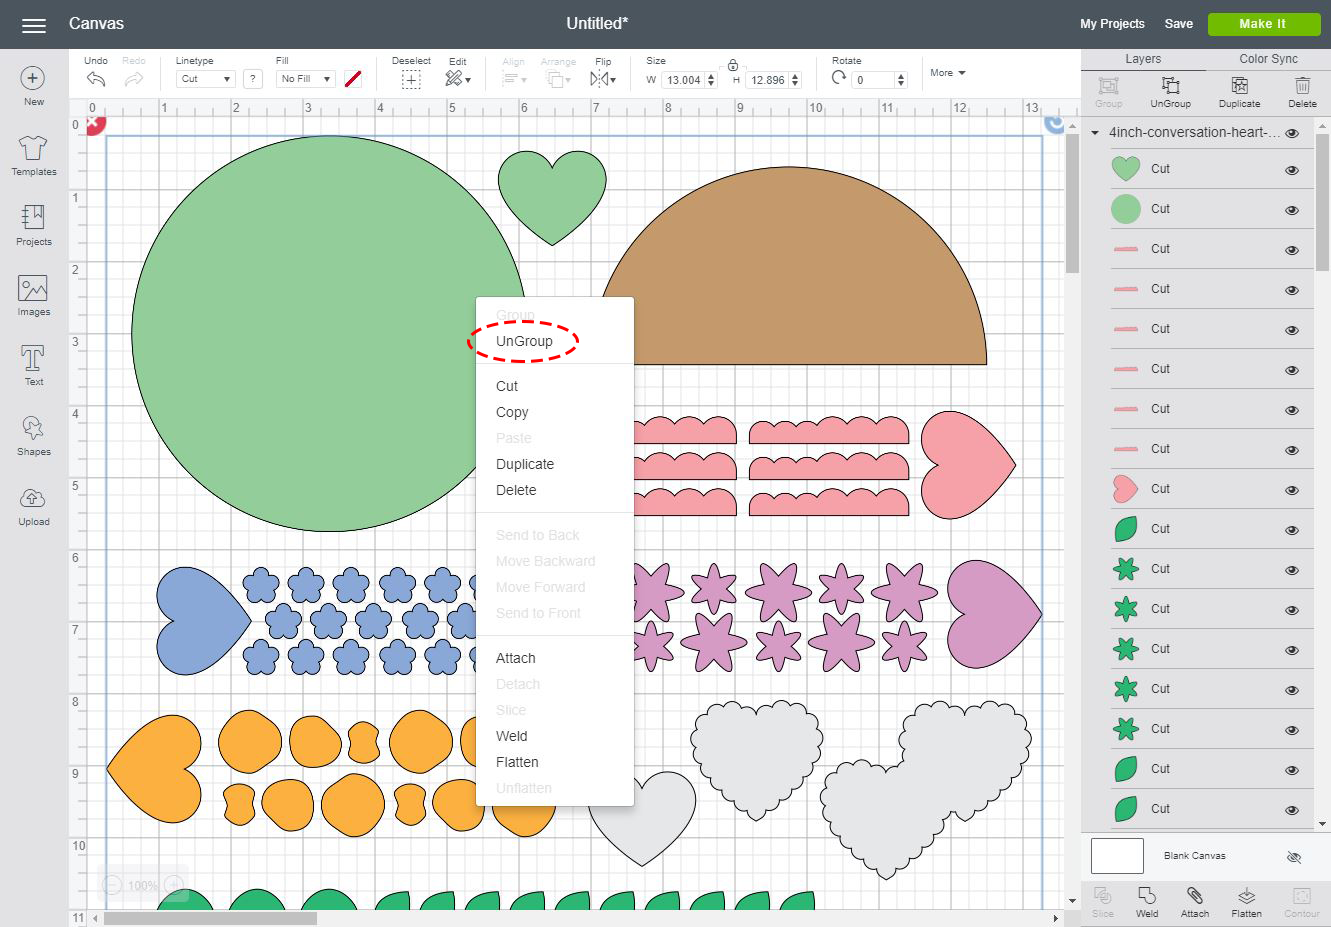
- Right-click on the image. In the drop down menu, click Ungroup. This turns every shape into its own layer, and may take a moment.
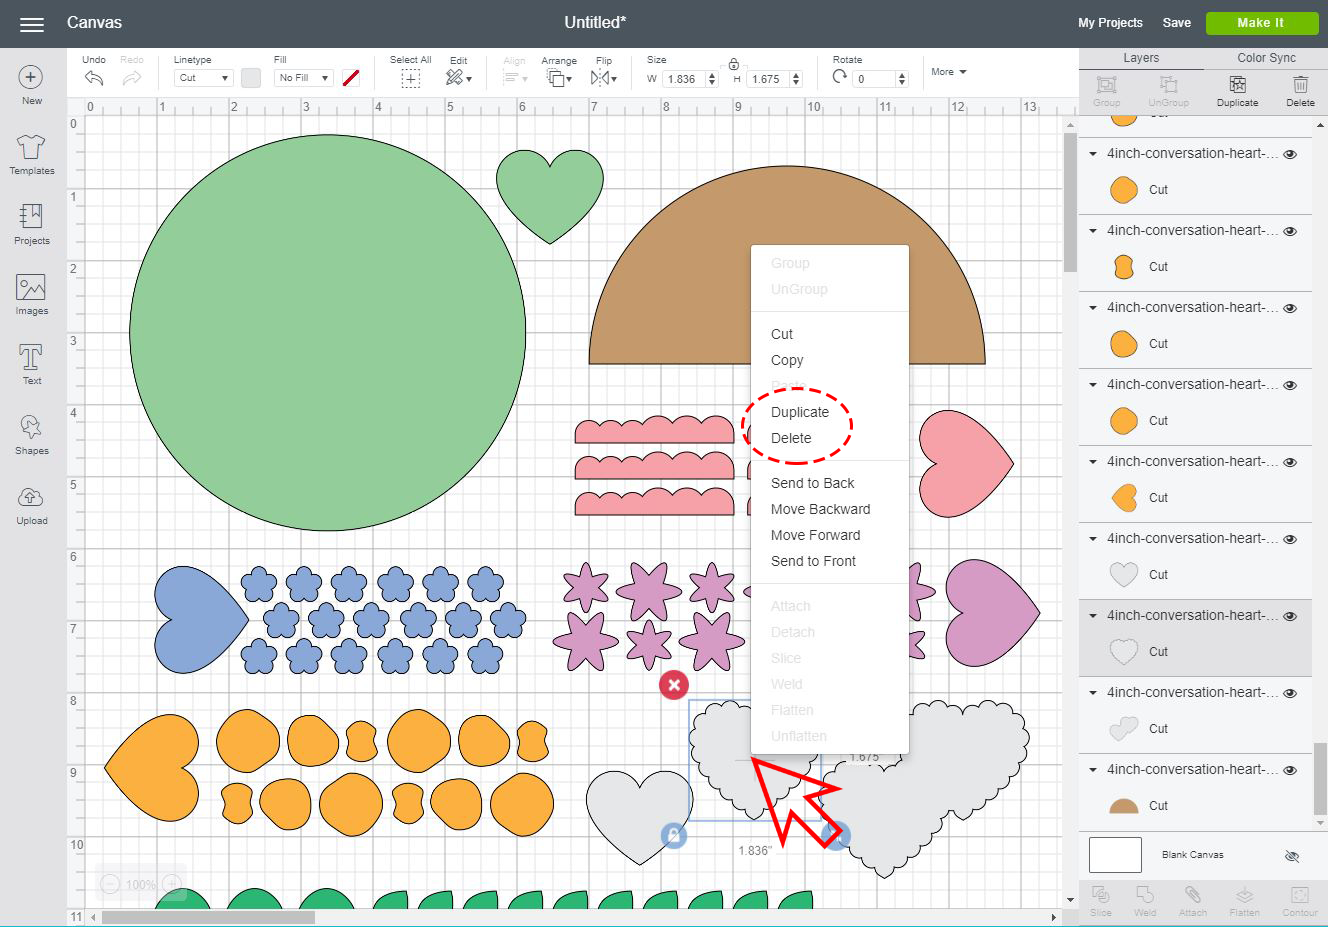
- From here, you can delete or duplicate any shape on the canvas, depending on which cut-outs you need for your design.
As an example, you may want to use the twin heart doily (shown in the 4″ demo), or you may not want an orange heart, etc. Also, you may want more or less of certain flowers.
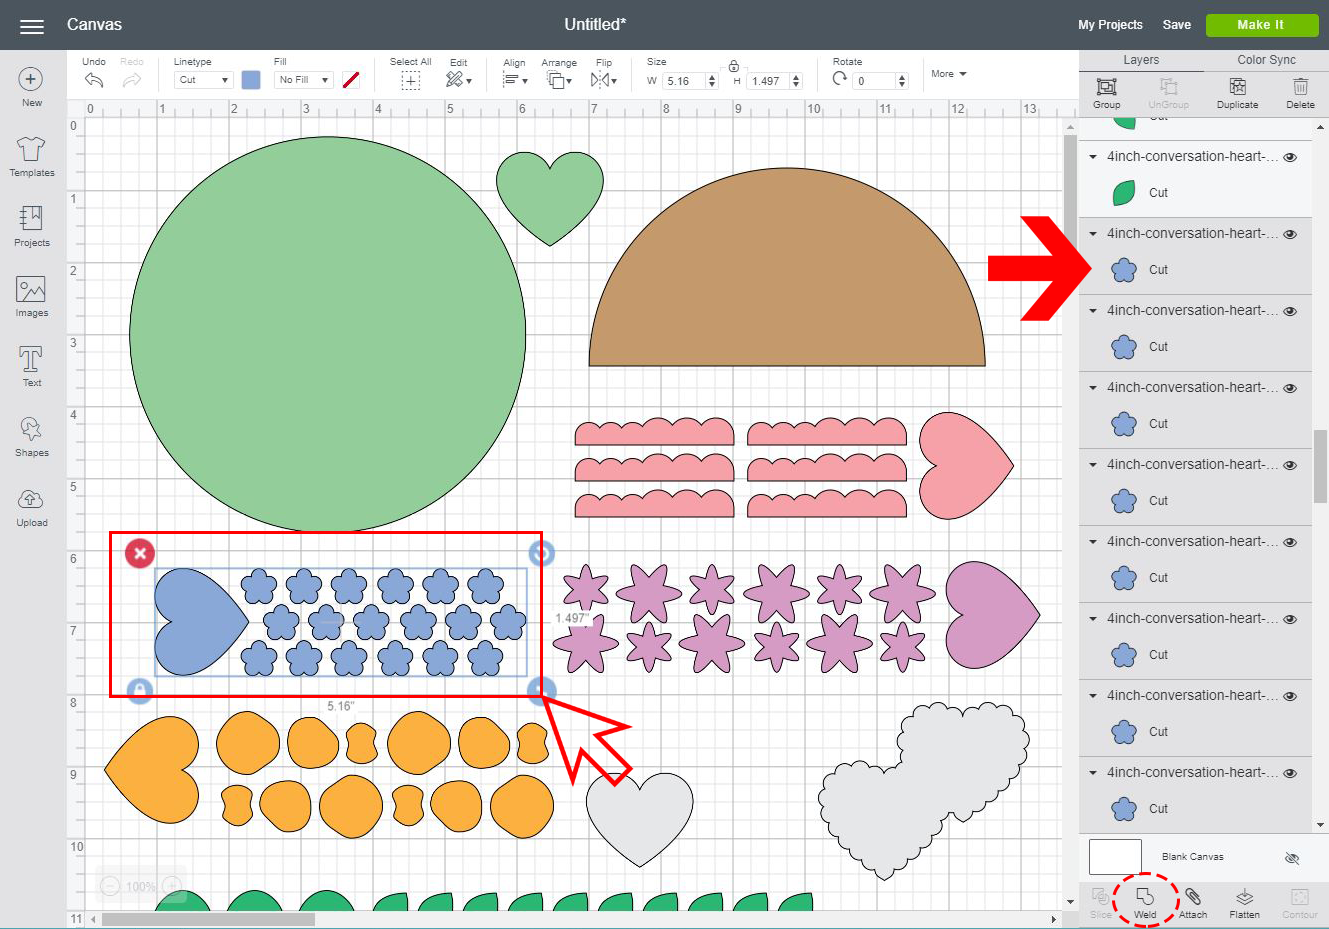
- Using the Layers panel on the right side of the screen, OR by clicking and dragging across the canvas, select all the layers that match in color, then click Weld on the bottom right of the screen. *You may skip this step if desired, however welding these groups will provide the most efficient use of your cutting materials.*
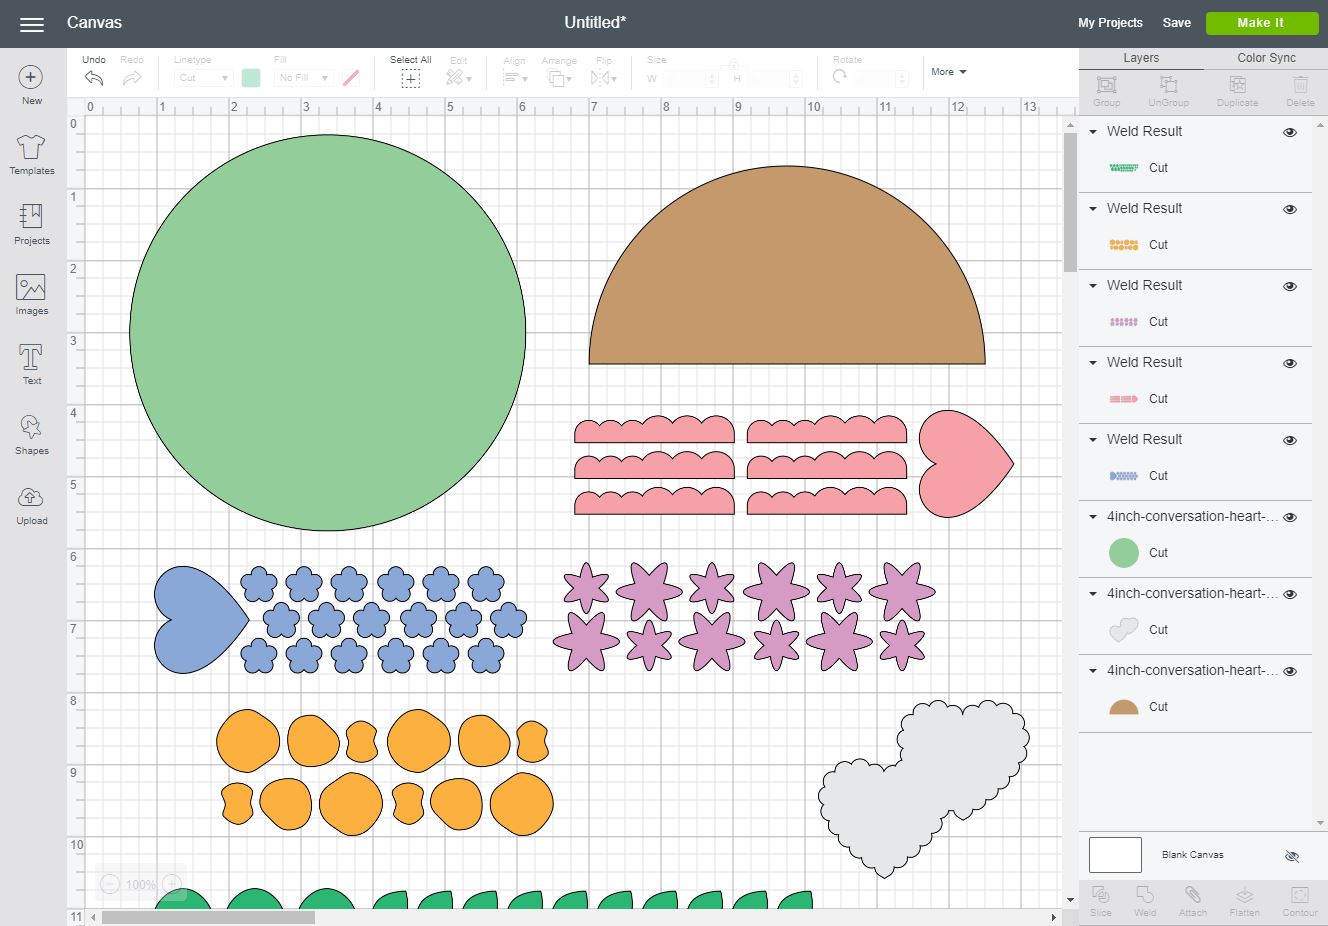
- The Weld Results appear on the layers panel on the right side of the screen. Once each separate color is welded together, click Make It.
*In the example image above, I will have a blue and pink heart, all the flowers and leaves provided, and the twin-heart doily. *
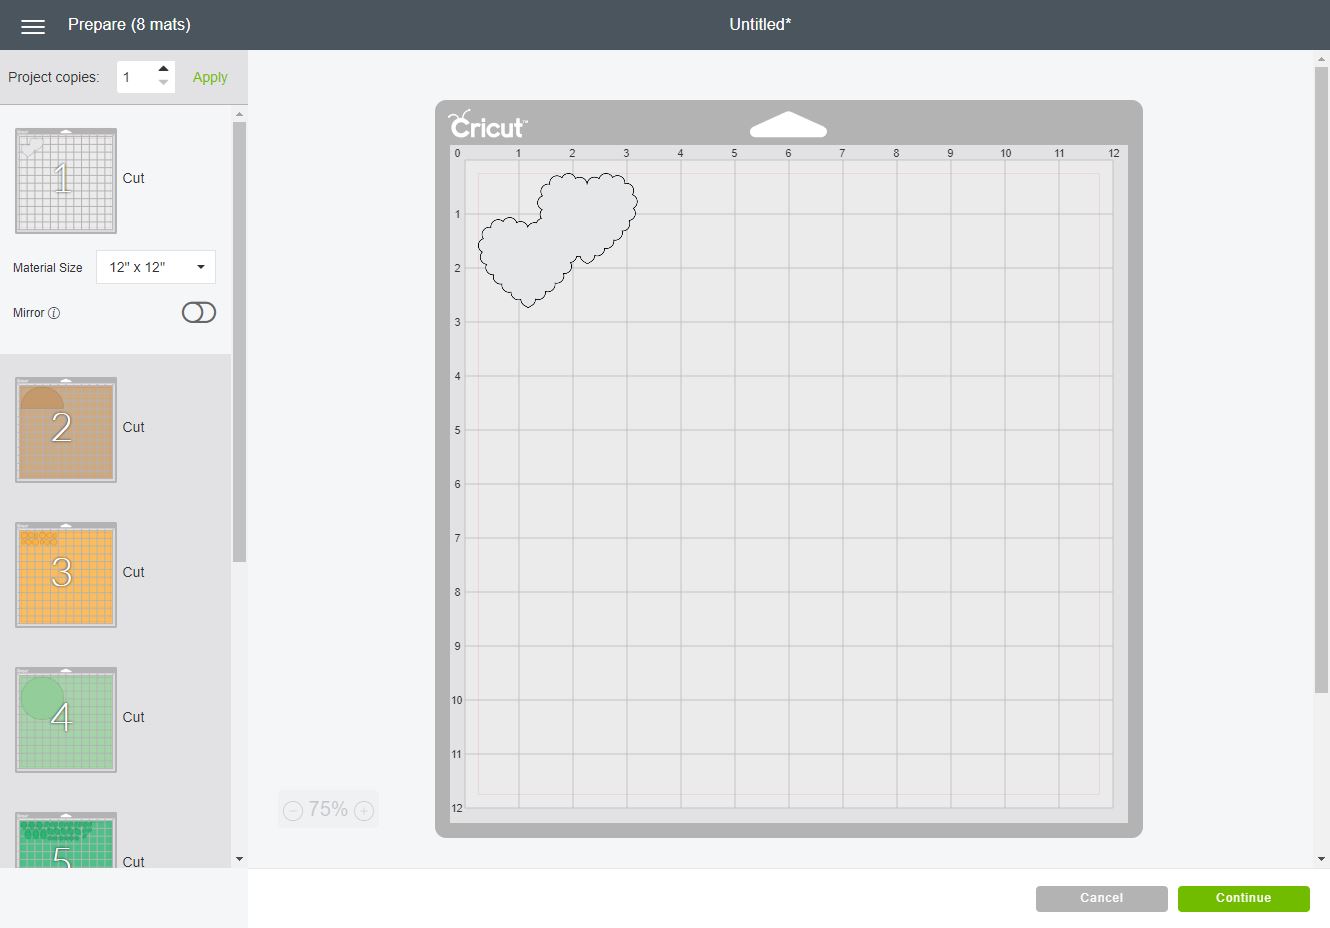
- The layers will automatically separate onto different mats based on color. Click Continue.
- Follow the on-screen instructions to select your material – FELT.
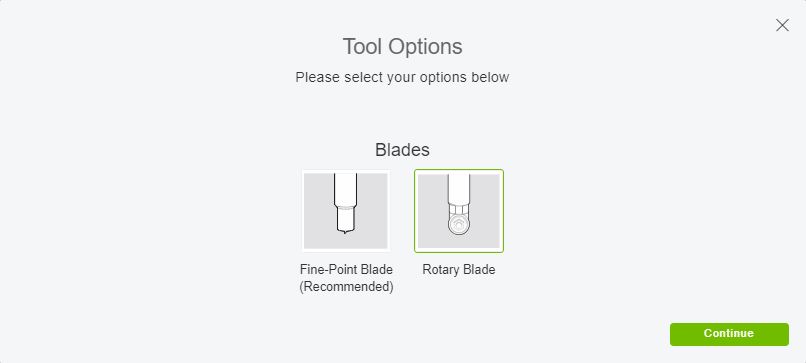
- Click on Edit Tools on the far right side of the screen, then select the ROTARY BLADE and click Continue.
- Insert the fabric grip mat with felt into your machine to cut out your Valentine Embroidery Hoops!
Aaaand as promised….

Behold, the power of Photoshop. I told you it looks good even when there are no stamps.

This is a great project! Nicely done and easy to follow.
Thank you Vicki! 😀