
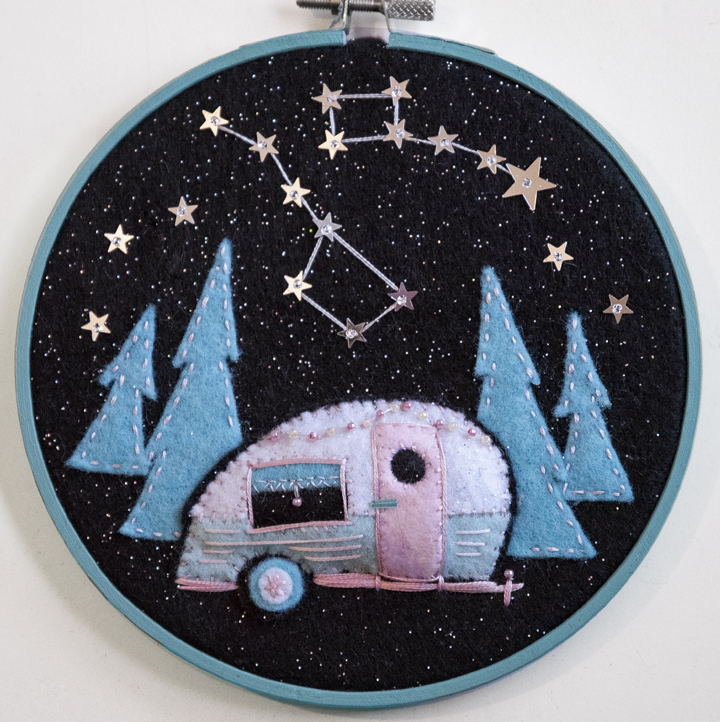
An ode to nights spent under the stars in a happy camper! Create this 6″ embroidery hoop decor using a craft pattern designed specifically for Cricut® Maker.
Click here for the pattern on Etsy. Cricut Design Space computer instructions follow the assembly instructions. Checking the instructions before proceeding with assembly is recommended…
★ Thread, size 10 beading needle, size 7 embroidery needle
Assembly
After placing my background cut-out into the hoop, I used a simple running stitch to sew my trees onto the lower portion of the circle. In the upper portion of the circle I had room to add star sequins. I chose to make the big and little dipper to depict a late summer/early fall sky, but you could do whatever you wish. If you’d like to create constellations like mine, sew the stars on first and then use two strands of light grey floss to create the lines between the stars.
After my star and tree background was in place, I moved on to the camper. I pinned my camper pieces onto the camper-shaped backer piece like a puzzle.
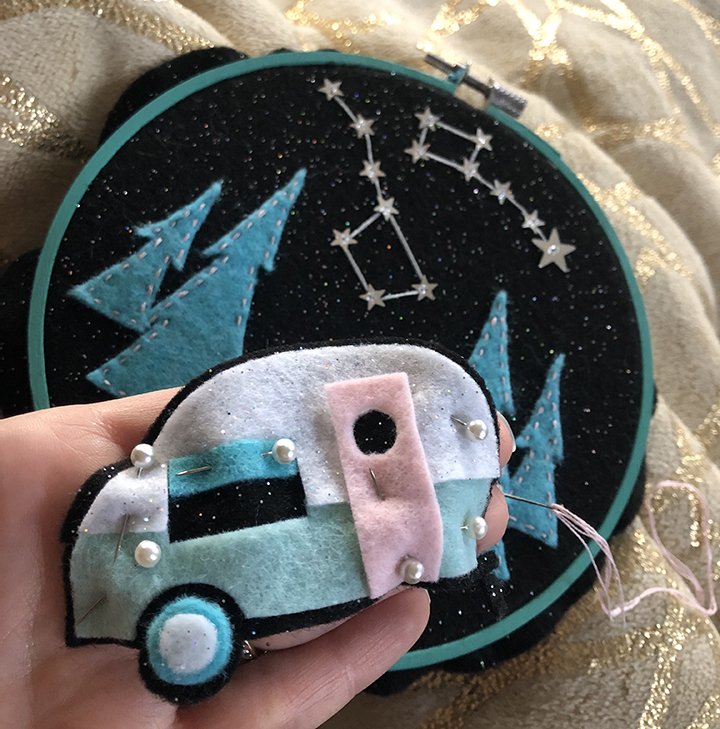
While they were pinned in place, I sewed the pieces onto the backer, but not along the outside edge of the camper. I left this open for later when it was time to sew it onto the hoop.

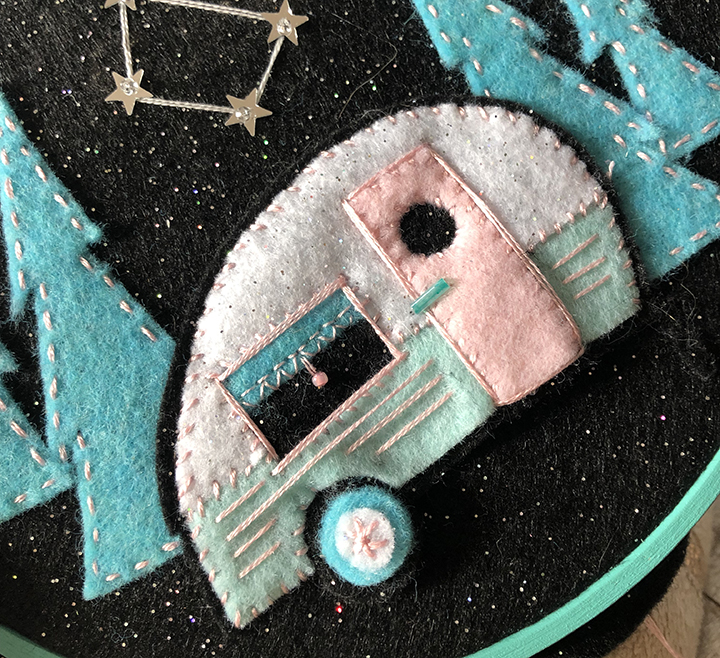
I dressed it up with a door and window frame, door handle, curtain pull cord, some patterning on the window shade and paneling details. Then I sewed it onto the hoop utilizing the outer edge of the camper. Before I finished sewing it on, I stuffed the camper with a little poly-fil.
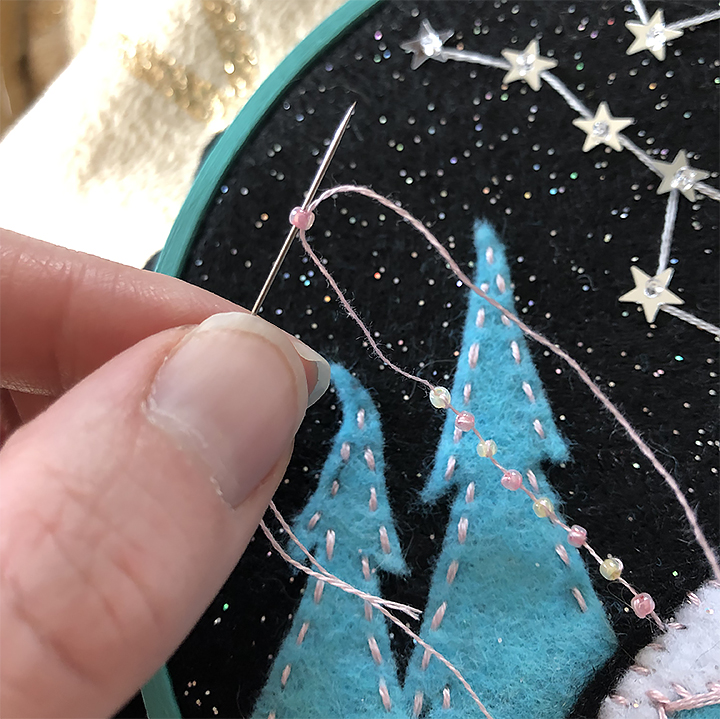
I felt compelled to add string lights to my camper, so as a last step and completely unnecessary detail I strung beads onto one strand of embroidery floss. If you bead the floss, then double back and pass the floss through the bead a second time, you should be able to position and slide the beads where you want them on the strand and space them out in a way that looks like string lights.
I sewed on a few more details – a chassis, step, hitch and a few extra stars. For this project I preferred the look of a clean hoop, so I cut the excess felt from the back. Viola! Finished piece 🙂
- Open Cricut Design Space.
- Click on New Project.
- Click the Upload button, then click Upload Image.
- Drag and drop to upload happycamper.svg, OR click Browse and navigate to the file, then click Open. Click Save.
- Click the image, then click Insert Images.
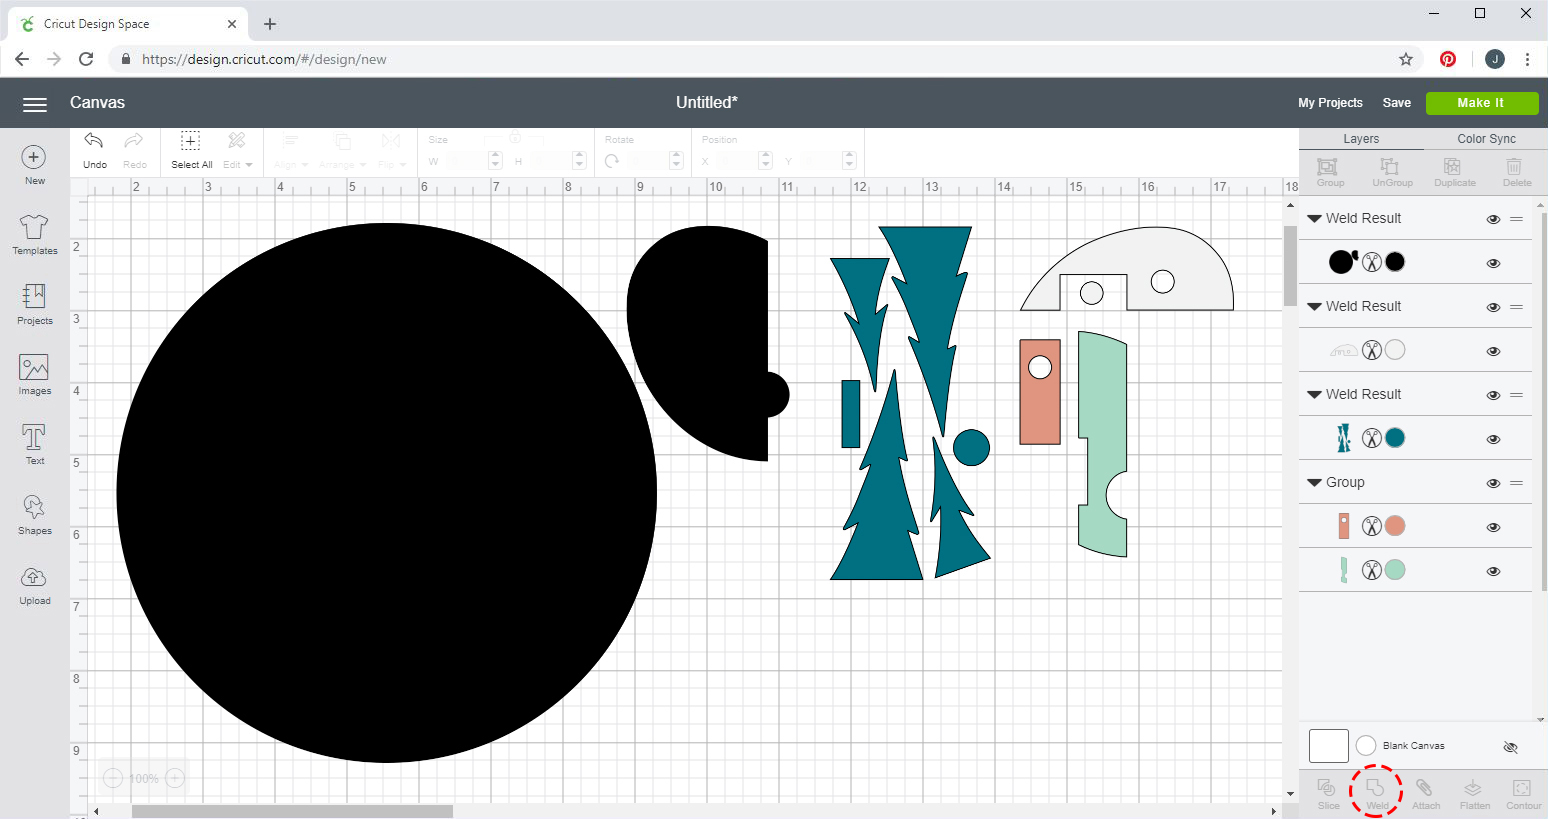
- The image will appear on the Canvas. Under Layers on the right side of the screen, select all the layers that match in color, then click Weld on the bottom right of the screen. Do this for every color.
- You will see the Weld Result on the layers panel at the right side of the screen. When each separate color is welded together, click Make It.
- The layers will automatically separate onto separate mats based on color. Click Continue.
- Follow the on-screen instructions to select your material – FELT.
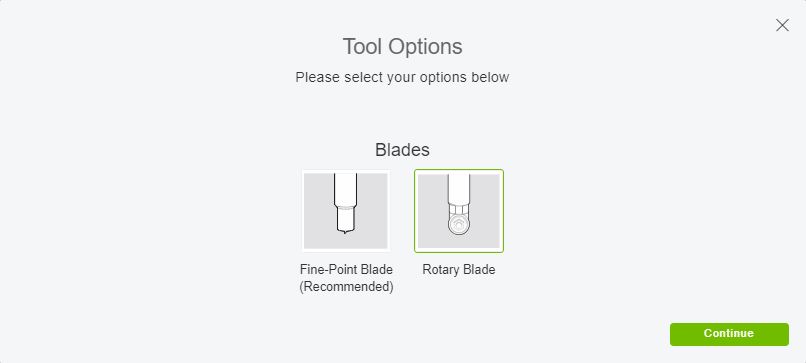
- Click on Edit Tools on the far right side of the screen, then select the ROTARY BLADE and click Continue.
- Insert the fabric grip mat with felt into your machine to cut out your Happy Camper ornament or decoration pieces!

Recent Comments